Thursday, 21 March 2013

Boo to you!


Who doesn't love Halloween fabric?  I just love everything about Halloween and when I saw this fabric for sale on Fatquartershop.com I couldn't resist.  
 It's Boo Crew by RJR Fabrics.
 The dancing skeletons are so cool and I love the colour and expressions.  I really wanted to showcase the material and not cut it up too small so thought about using offset log cabin centre.  That wasn't working for me so I searched for images with the keywords halloween quilt and found lots of inspirational stuff.  Nothing there was quite what I wanted. 

After a few days of mulling it over I had an idea I wanted to do squares within a square on point.  I'd never tried it before but thought it looked really good and would showcase the material in the centre block.  Not knowing how to go about it I Googled some more and found a free Riley Blake design called Spooky Squares.  It was perfect for what I wanted.  The original pattern was a 5x5 block design which was a little too wide for me so I made mine a 4x4. 


While the squares on point look really great I have to say after 16 of them I had enough.  I hadn't discovered chain piecing when I made this and each block made one at a time took some time and there came a point when I knew I wasn't going to get it finished by Halloween.  Still I decided to carry on and finish the top and quilt it later, hopefully before Halloween 2013 comes around!


I ran into a little trouble with the sashing.  Not with colour choice this time around but size!  Oops one of my blocks was off and it was a struggle to sew the rows together neatly.  I also cut some points but I can live with that.  I realised after watching an episode of Quilty (free videos by Mary Fons for beginner quilters) that I should always cut my sashing and borders to size and then sew rather that just sewing them on and cutting the excess off later.  Any creep with bias edges will be pulled back in with properly cut and pinned borders.  Oh well, live and learn!

I also had a bit of difficulty with material quantity.  I had plenty of material for the squares themselves but borders and binding I miscalculated and ran out.  So I bought more material not in the same range as not available at LQS but a co-ordinating colour and the bright green neon squares - I love this in the quilt.  It really makes the squares pop out at you (not so nice as a FQ on its own!)

I had to rip out a border piece and replace with a piece from the backing material I had bought on sale after Halloween as I was so slow making this quilt top!  I bought this lovely print of Howloween by Deb Strain for backing and the colours co-ordinate so well a piece of it has going into the border. 


So top finished,  Backing fabric and batting on hand, I will surely get this finished for this Halloween, right?


Craftsy Block of the Month part 3


This the third post in a series about Craftsy's free online block of the month class from last year 2012 with Amy Gibson.  I cannot say enough good things about this free class and Amy is a brilliant instructor.  It's still available and for a look at the blocks I've made through the year see my two earlier posts and the last 3 months blocks below.

August:  Stars.  I had made the Ohio star before on the Whipstitch e-course with Karavan fabrics by Valori Wells and loved it.  It would look great Giant sized and would showcase nicely a novelty print  for the centre square.  It's essentially a 9 patch with quarter square triangles. 


The second block the Double Star looks more complicated and includes flying geese but Amy's instruction is great and takes any difficulty out of making this block and playing with fabric on this one was fun.  I just love the lavender and pink. 

September:  Curved Piecing.  I was dreading these.  I hadn't done curved piecing before even though there was a Drunkards path block on the Whipstitch course I had completed earlier.  I just skipped that block as I had enough blocks made for my quilt in the other easier blocks.  The curved piecing wasn't too easy but I certainly got better at it by the time I had the first block finished.  Amy provides templates that can be used to cut out the curves and provides a link to a bought template as well that should make life easier in the cutting.  I found the cutting ok.  Just had to concentrate a bit for the piecing.  The effect is really lovely and I'm not afraid of curved seams anymore.  They wouldn't be the first blocks I'd reach for though and I certainly need more practice at them!


I ran into a little bit of trouble on the chain block pattern.  All the squares and subsequent seam allowances left me with one side 1/4" too short.  The other side was perfect so I have no idea what went wrong.  I'm putting this on the back anyway as my hexie challenge block with the bees will be used on the front.  Cleopatra's puzzle block came out fine so big mystery!

October:  Paper piecing.  Agggh - this one nearly drove me batty.  I like the results, crisp clear lines, perfect points and complicated shapes are made relatively easy but this uses a lot of material and my machine Husqvarna Viking 600e does not like to sew with no thread in the needle which you need to do as the first step in paper piecing blocks.  Amy provides the templates which you print and sew along the lines with an empty needle to make little holes in the paper.  My machine would sew for a few seconds and then beep and stop to tell me there was no thread in the needle.  I couldn't find a way to turn this off so I persisted getting more and more annoyed by the time the 4th square was done.

Once pierced you pick your material and put it under the correct shape which is numbered making sure there is enough fabric to cover the entire shape + seam allowance.  This uses quite a bit of material and instead of using scrap pieces I had to mostly cut from my Fat Quarters.  You always work from shape number 1 upwards and re-sew along the pierced lines with thread this time along the full length of the line.  Then trim off the excess  at the seam which always seemed to be quite a bit.   When the material is all sewn to the paper block you tear the paper away without ripping stitches.  The initial piercing weakens the paper sufficiently to allow it to be pulled away easily leaving the fabric block intact.  Then its just a case of sewing these mini blocks together to make the complete finished block. 

The two blocks look great.  The Friendship circle being the easier of the two.  I did make a little mistake on the Flying Geese block.  I printed all the squares for left hand turning and right hand turning  and then accidently picked the wrong direction for my last block and I've got a pleat in the middle where the seams gather.  I'll get there eventually!

The November lesson covered sashing, basting and binding which I have yet to do.  I know its March and I'm 5 months behind.  I got distracted with Bounce and Boo to you Halloween quilt and Christmas lone stars.  So these blocks are coming back out of the plastic tub and I aim to finish by Easter.  Watch this space!

Craftsy Block of the Month 2012 part 2


Yesterday I wrote about taking part in the online BOTM series held by Craftsy in 2012.  They have another one this year too but here's how I got on making 2 blocks on a different technique per month.  Led by Amy Gibson who blogs at Stichery Dickory Dock, the series is brilliant, great fun and very informative.  Plus it's free!  Yesterday's post was on January to March: slashed blocks, Half Square Triangles and String blocks.  Today I'm looking at April to July.

April: English Paper Piecing.  I learned this as patchwork piecing in school and have tried a few times since to use scraps of material and cardboard templates to make cushion covers but I must admit didn't get very far with it.  I wasn't too keen on this month's block but once you get going this really it isn't all that bad.  And yes it used up a lot of scrap fabric!

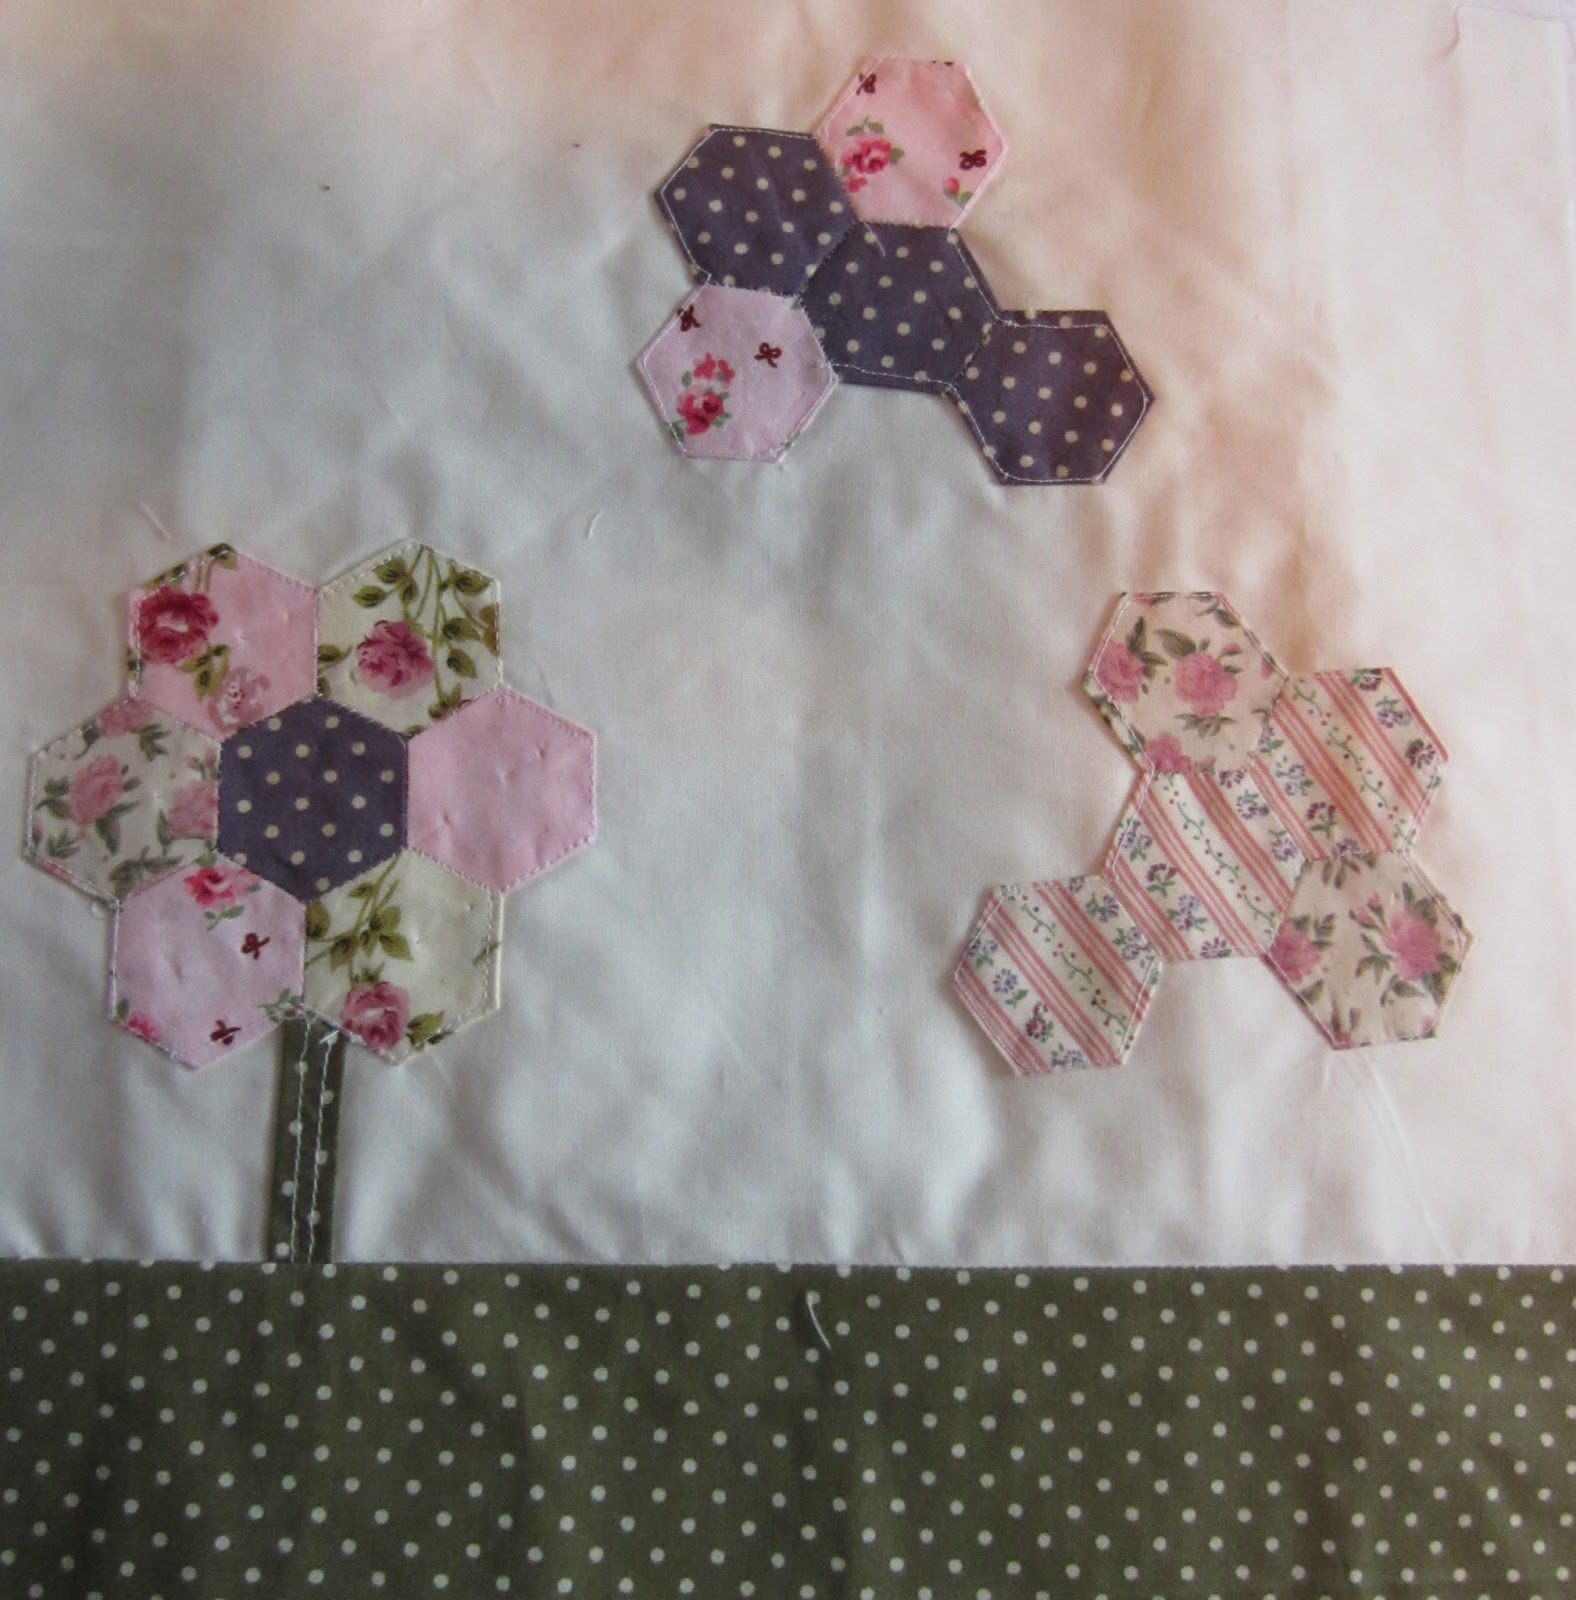
The first block was hexagons whip-stitched together in a chain and appliqued onto the background.  Amy's video takes you through every step easily with great explanations.  It is well worth a watch.  I think I must have watched it 3 or 4 times over.  The second block is called "Sunny with a chance of Hex!" Amy threw out a challenge to be creative with our hexies.  I made her original block and a variation with bumble bees below. 


Check out Craftsy for some really inspirational things people have done with hexies!  At some point I would like to make this as a block for a quilt.  I think this would be great in a baby quilt.   Really there is so much you can do with hexagons.

 
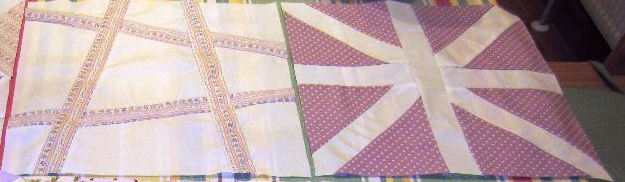
May: Wonky Log cabin.  This was fun!  Maybe I'm just suited to sewing with strips but I enjoyed this as much as the foundation string blocks in yesterdays post.  Again it gave me an opportunity to play with complimentary and contrasting colours in each of the blocks.  I love the offset squares in the first block and the wonkiness of the second block gives the impression of a house.  Really easy, colourful and just fun!

 June:  Modern 9 Patch.  The  Greek Cross and Octagon.  Looking at my blocks made so far they are heavily pink and purple.  I had lots of the flowery stuff to use as well so thought I might as well go green for the Greek cross to give a bit of variety in colour to the finished quilt.  The pattern itself is easy enough and with the right fabric this could make a really lovely quilt on its own.  I'm thinking of solids maybe?  They are 9 patches made up of 3x3 squares with  HST, squares and some rectangles.   I think the octagon is a really cool block.  Again really easy and this would look the business in a giant block on its own in a quilt. 


July:  Dresden Plates.  These look so hard and skilful but they are really not that hard to make.  You either use a template or a wedge shaped ruler to cut out the wedges.  I was able to use a lot of scraps on the first multi-coloured block.  You sew the top of the wedges right sides together with wrong side facing and then turn them out.  I used a knitting needle to push out the point.  A quick press and sew the wedges together aligning them at the top.  This leaves a nice big hole which is covered over by a circular piece of fabric and stitched down.  Ok so I didn't do the best job in the world at the center circle on the right hand one but practice makes perfect!  The video really helps explain the process and really stunning effect for very little effort!


The material here wasn't a problem either.  All the colours co-ordinate well and I love the scrappy look of the traditional Dresden.  I'm thinking of a rainbow effect on the more modern smooth edged Dresden would be nice and I also think this would make the perfect block  for a picnic quilt with laminate backing fabric. 

Up Next August to October!


Monday, 18 March 2013

Craftsy Block of the Month 2012 part 1


So it's a year on and a new 2013 block of the month is underway at Craftsy and I'm writing today about the 2012 block of the month.  What gives you say?  This is one of those UFO's (Unfinished objects) I carried over from last year.  That and a Halloween quilt which I hope to blog about next!  I'm hoping to spur myself on and complete these .

For anyone that hasn't tried Craftsy please do so - I am completely addicted and have to thank Jenny Doan and Craftsy for their instruction on my first ever quilt made of charm squares.    They have a lot of quilting courses amongst other crafts like knitting and crochet.  They even have some free ones - yes free!    They have recently uploaded presentations from Quiltcon featuring speakers like Amy Butler, Heather Jones and Mary Fons.  They are great - check them out!

There is a new 2013 block of the month but Craftsy have kept available the 2012 block of the month led by Amy Gibson who blogs at Stichery Dickory Dock.  Amy is a brilliant instructor and very easy to follow.  Her blocks are lovely and would make great quilts on their own but in this class she has put together tutorials on 2 blocks a month centered around a different skill.  January was slashed blocks, very easy, quick and great fun.


February: HST (half square triangles).  This one was way more tricky.  I ran into an issue with material selection in addition to scant 1/4" seam issues and ended up with an ugly block 1/2" too small.  So I made it again and got a better result!

 
This brings me onto the point about material selection.  The 2012 BOTM was one of the first things I tried in terms of quilting.  It was brilliant for a beginner but I made the mistake of not spending the money and buying a FQB (fat quarter bundle) that I really liked.  As this project needed 25-35 fat quarters plus background fabric for the whole quilt I should just have bought as I went along.  Instead me being me, I bought everything up front and looked at the cost as a whole.  Trying to minimise this expense I bought the best value FQB I could find on Ebay and ended up with some lovely fabrics in the bundle and some not so lovely, flowery things, that I would never choose on their own.    This made the material selection for the individual blocks a tad tricky!  

I didn't realise this of course until I made a really ugly block as my first attempt at February's HST.  This was very much a "do I really want to do this?" moment for me and made every colour decision and material selection for this project thereafter that bit harder.  I second guessed myself and eventually enlisted some help.  I asked my mum to help me figure out what went with what.  My mum doesn't sew but worked for over 40 years in a speciality food shop in the city center and every year did the window displays.  She knows colour and colour co-ordination like no other.  It just comes naturally to her.  So she helped a lot in this project - thanks Mum!

 
March: Foundation piecing - string blocks and broken spider web.  This was the best fun.  Everything I said about the difficulty of colour choice in the HST blocks was non-existent here.  Loved these blocks and I love how different they look depending on complimentary and contrasting colour.  Really scrappy and really pretty.  I have got to make more of these.  The technique isn't that hard.  Amy's instruction is really easy to follow.  I learned on Pepper Cory's class that in the past instead of a fabric foundation, a lot of string quilts were made with paper from telephone books to give support to the scraps while sewing and then removed afterwards.  April May and June next!

Wednesday, 13 March 2013

Wilbur


Meet Wilbur aka George, a 7 year old Basset Hound we adopted from Ash Animal Rescue last Sunday.  He has quickly cottoned onto the Charly & Ben's crafty corner concept.  When I'm working at the Kitchen table cutting fabric or sewing up a storm they take up position, Charly the JRT to guard my stash box and now Wilbur to settle in for a snooze guarding nothing but keeping an eye out in case anyone heads in the direction of the kitchen!  


Wilbur was born to a breeder in Co. Cork who sold him to a lady in Mayo with a young family who named him George.  George was "wired" back then and still at the age of 7 is full of energy.  Sadly with a little one on the way George became too much to handle and found a home with Seamus who drives a truck.  After that we don't know what happened to him but he ended up in Mullingar  dog pound in February and on his last day there he got a stay of execution when someone rescued him for Ash.  At the rescue center he was named Wilbur.  He's a lively Basset and a handful so after a few views and walks and a few people realising he was not the dog for them we made the journey to Co. Wicklow and took to him straight away.   Probably helped we had a Basset before (Ben this blog is named for).  Wilbur is microchipped so that's how we found out about his early history.  He's settling in nicely - not chewing on batting or ripping into FQB's but as soon as you move towards the kitchen this dog is unreal.  He gets a boost of energy and goes into overdrive.  Did you know Bassets can jump and when up on their hind legs can reach the kitchen counter?

Still it's nice to have company in the crafty corner.  Makes me feel good knowing Charly (and Wilbur?) are on guard!


Little Houses


I first came across Schnibbles by Miss Rosie's Quilt Co. when doing a Google search by images of Kate Spain's fabric collection Good Fortune.  I was looking for inspiration trying to decide what to do with 3 charm packs I had just bought online.  I found a lovely little baby quilt made completely of rows of Houses and I just loved it.   


 I found the pattern on Etsy and bought a printed copy.  Of course when I received the pattern I decided I wanted a blue sky and so chose to use 2 charm packs I had on hand of Nancy' Halverson’s Forever Spring which has some lovely blue patterns in the perfect amount for what I needed.


I had to read through the pattern twice before feeling brave enough to start cutting.  Once started though this flew together and it was really great fun.  There is something about little houses that are so cute and an enormous amount of satisfaction to be had with the completion of each little block.  Laying the house blocks out in rows, swapping the colours around, seeing what worked well and what didn't was also great fun.


I have to say this was a great little project, I love the end result and with 2 charm packs + a bit of sashing it was very economical as well.  I quilted it in diagonals with a walking foot.  Keeping it very simple.  I can see these little houses in a cushion or table runner.  Definitely one I'd make again!


Cabled Hat


A while back I made a sweater for my mum and bought yarn for a cabled section that wasn't quite the right colour.  It was too gray against the dark blue of the sweater.  Instead of returning the wool, a lovely Italian merino,  I kept it to make a hat. 

Being  a wonderful girlfriend I decided that my man needed a hat that he could wear while out coaching or on the river rowing.  He even approved the pattern aptly titled  A Hat fit for a Fella.    I made the hat and then he proceeded to ignore it and walked straight past it laid out on the hall table every weekend. 
Eventually when he couldn't find his Thinsulate hat, as a last resort, he put it on and now wears it quite dutifully!  So much so it was admired by his Auntie Maura who wanted one but in beige.  Luckily I had Debbie Bliss Cashmerino Aran in the colour stone left over from this hat Photography Hat  that I made last year.

So out came the 5mm circular needles and this pattern was written with a modification for adult female so all I had to do was cast on and knit away.  The pattern has a ribbed brim which is lovely and stretchy and very easy to do.  The men's pattern is evenly spaced between purl and plain, the women's version has odd numbers to fit the reduced number of stitches so takes a little concentration for the first line or two and then it's just changing stitch as you come to the different sections; easy out!


The cabling is done over 9 stitches and the pattern repeats three times to give a lovely effect.  No cabling at the crown so this was a very quick knit and came together very easily.  I enjoyed making a second one of these and am considering one for myself now!


Related Posts Plugin for WordPress, Blogger...