Showing posts with label Exposure. Show all posts

Friday, 6 June 2014

Photo Friday - Adjusting for exposure in your craft photos

So far on Photo Friday, we have looked at white balance for correct colour and looked at understanding the histogram to evaluate exposure.  Last time, we used this information to correct underexposed images and today we will look at overexposure i.e. too much light.

For the best colour accuracy and most pleasing images, it is best to shoot your images in natural daylight.  Common advice is to take your photos near a window and use the directional light from outside to light up your shots.   
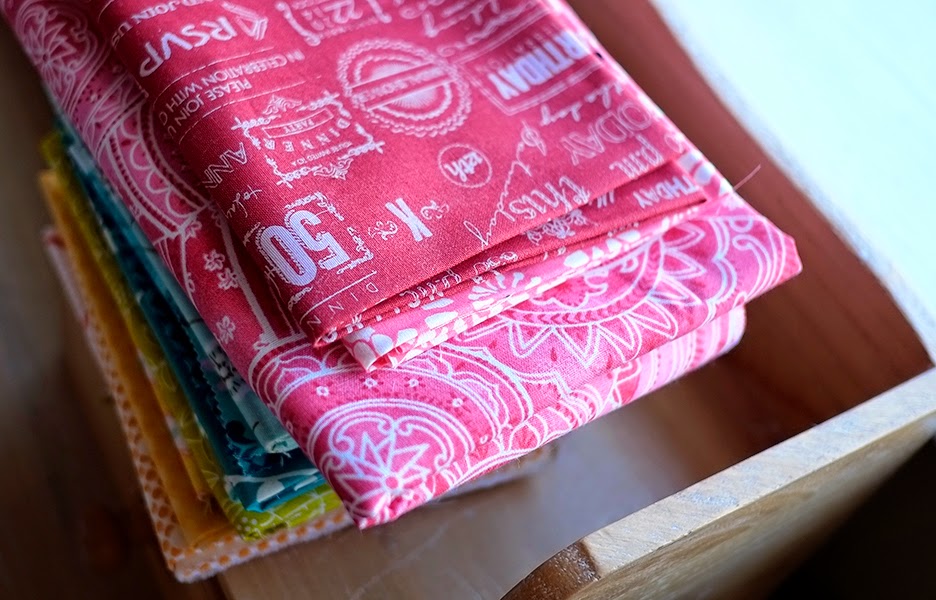

The camera isn't as good as the human eye at seeing a wide range of tones from light to dark in one image and tries to average out the scene.  Sometimes, when you have an image that has a lot of variation from light to dark or the light is very bright you can get areas of overexposure in your images.


In this photo of a fabric bundle, the top material is way overexposed.  In the histogram (representation of tones in your image from dark to light) you can see this as the spike on the far right.  We don't have a clean rise and fall of the curve at the white end but a sharp peak showing that the highlights have been clipped.  We have lost information in this part of the image and detail has blown out to pure white.

Reducing the brightness in photo processing software will tone down the brightness of the image but can't put detail back in the top fabric.  Once that information is gone you can't get it back.


Viewing the image in Camera Raw, we can see the over exposed areas covered by a red mask.  Many cameras will show you these areas by hitting the playback button and reviewing your image.  If you toggle through the display modes, most cameras will show you blinking white or red areas on your image.  (Checking the image on the back of the camera is called chimping and checking for highlight clipping is called watching the blinkies!)

If you shoot with RAW files, Camera Raw can help recover some of this detail.  If you shoot in JPEG'S, Camera RAW can't help as much but can help a little.  (Remember Lightroom automatically uses Camera Raw and Photoshop and Photoshop Elements will allow you to process JPEG images in Camera Raw with the Open As command in the file menu).


Reducing the highlights down quite a bit makes a big difference  in the image and brings in some detail.  It is better but still not a great image.  The most important thing to remember here is to try not to clip your highlights if they contain important information in your image.  Once they are gone they are next to near impossible to recover.

So what can we do instead?


One of the things we can do is deliberately reduce the exposure and sacrifice some of the shadow detail to black.  We can also change the angle we shoot at.  This is still quite contrasty but a much better image now showing detail in the blue fabric.

If the light is very bright, we can diffuse it by placing a sheer material between the light source and our subject.  Photographers often use a circular pop-up diffuser to soften the light and reduce contrast.  These can be very handy if you take outdoor photographs of flowers on bright sunny days!


In our house we have a blind that lets in a lot of light through but I can use it to soften the light if it is very bright.  Lightweight tissue paper would work too.  The downside to this blind though is that at nightime, all my neighbours passing by, walking their dogs, can see me sewing away at the kitchen table!


Perhaps the best thing to do is to wait for the light to change e.g. sun moving behind a cloud (which in Limerick won't be too long a wait) or shoot at a different time of day.  There is a lovely quality to early morning and late evening light that landscape photographers love and we can make use of too in our craft photos.


The sun moves around our house with this window in shade in the mornings and full on sun in the evenings.  The best time of day for me to use this window as my light source is early morning.  If I need to take photos later on in the day I move towards the back of the house!


So if you are having trouble with too much light you might have fun trying out what window to shoot at, shooting at different times of the day,  playing with diffusing materials and watching the blinkies to protect highlights in important areas.  I hope these tips on handling overexposure in your photos help!

Plum and JuneI'll be writing a few more of these Photo Friday tips while the Plum & June Blog hop for new bloggers is going on through June and July.  More next time!

Friday, 30 May 2014

Photo Friday - Understanding the Histogram for correct Exposure

Still working on 3 cushions, 4 quilts, lots of blocks... Not yet at a Friday Finish, so, how about a Photo Friday tip instead?

A lot of cameras, when viewing an image under playback or liveview, will have the option to show you a histogram.  All digital SLR (Single Lens Reflex) and mirrorless cameras aimed at enthusiasts will have this feature.  Point and shoot cameras may have it buried in the menus.


Unlike the old days of film, where you either trusted the camera's meter or bracketed (take 3 shots, 1 normal, 1 at more exposure, 1 at less exposure) and accepted what you got, with digital, we can get instant feedback and make adjustments straight away to take better photos in camera.  This is very handy when you are shooting something that can be difficult for the camera to meter.


Cameras are sophisticated pieces of equipment with different metering modes and algorithms that process what the camera sensor sees into what it thinks is the correct exposure for your image.  Subjects with a lot of white in them or subjects with a lot of dark can trick the meter into underexposing or overexposing respectively.  These would be common types of images to take in quilting!

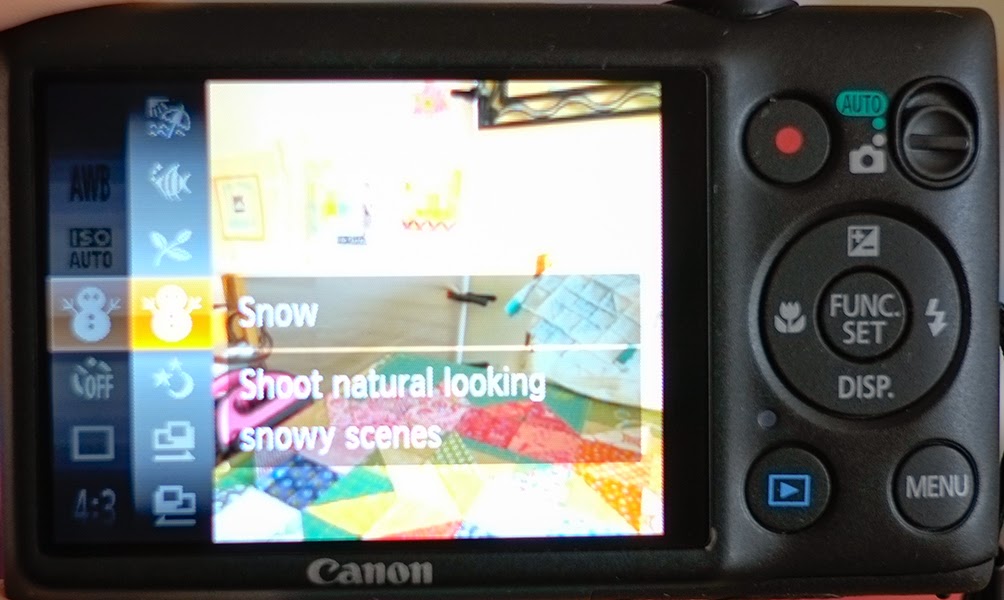
This is because the camera's default is to meter and give a reading for medium grey or 18% grey (a grey which reflects 18% of the light that falls on it).  So a photo of all white would be darkened and a photo of all black is lightened (try filling the frame and taking a photo of a black cat and see!)  If you have a compact camera you can help the camera out and chose a subject mode especially if taking photos of the kids in snow!

If you don't have a histogram available to you in camera you can view the histogram in photo processing software.  I've used Lightroom here but it's available in Photoshop Elements (F9 will open it) and also the free editor Pixlr will show you a histogram in the adjustment/levels command.


So how does a histogram work?  The  histogram takes information from the image captured by the sensor and gives you a graph of the tones from dark to light.  Areas of the image that read as black are represented on the left and areas that read as white on the right.  The information is available in the individual colours Red, Green and Blue as well as a combined RGB showing overall light to dark.

This image shows a spread of values from black to white with a little bit of clipping at the white end.  Just after the peak near the shutter speed of 1/210 sec you see the values start to rise again.  Try not to clip your whites as you will lose detail in these areas.  In this image, this tiny bit of clipping represents the bright sky peeking through the fence in the image above and I'm happy to let these blow out. (Sometimes, when taking a photo of a heavily saturated subject, you can get clipping in one of the colour channels.  If this happens you might want to deliberately underexpose to capture all the colour information!)

In this image below of a scrappy star there is a lot of white and you can see the histogram has no information showing at the white end.  This means that this is a little underexposed.


Adjusting the photo in Lightroom simply by clicking on Auto adds exposure and whites and gives a brighter image with a histogram spread out more evenly.


In this image  of a log cabin block you can see a lot of white but the image histogram has everything centered in the middle.


Adjusting gives a more right centered histogram with brighter whites and more detail in the dark blue.  This is a high key image with only a small dark area so I'm happy with this and don't feel the need to stretch the histogram further into the darks. 


Cameras that have the ability to shoot RAW format will give the most flexibility when processing your images.  RAW files are massive and contain all the raw data that the camera has captured.  Think of them as the negative of old and needs processing to get your finished image.  If you shoot JPEG you get smaller files but the camera has made the processing decision for you.


Did you know you can open your JPEG images in Adobe Camera RAW?  It doesn't give you the same flexibility as a RAW file but can help making adjustments easier when tweaking JPEG's.  The screenshots I've been showing you in this post are all from Lightroom.  Lightroom is built around Camera Raw.  If you have Photoshop or Photoshop Elements you can open your JPEG file in Camera Raw.  In elements go to Open As in the File menu and click on the drop down to Camera Raw.


Last Friday we looked at correcting colour using white balance adjustments.  This is the first step in the Camera Raw workflow and is another option to remove colour casts.  We've looked at understanding the histogram and in this post corrected underexposed images.  Next time we'll look at using Camera Raw to help with overexposed images.

I hope this info makes it easier for you to evaluate exposure in your photos.  There are a number of different ways to adjust you images but try Camera Raw if you can.  I'd be interested to hear how you get on with it!

Related Posts Plugin for WordPress, Blogger...