Wednesday 27 November 2013

More Fussy Cut Squares

Amanda @ What the Bobbin has been hosting a swap of 4.5" paper pieced squares with fussy cut centres.  Round 3 is Christmas themed so I made some squares using Joy by Kate Spain, Santa's Little Helpers by Riley Blake and some Nancy Halvorsen charms from Nancy's Favourites Holiday Collection.  


I received 12 from Amanda for Round 1 which was not themed and open to anything we liked.   I made 4 more to go with the 12 and yesterday evening pieced them into a cushion top.  Aren't they gorgeous?  I just love them!


I hope to do the same with the 12 Christmas themed ones from this swap.  4 x 4 gives 16.5" so I think they will make fantastic cushions.  I think they would be really cool with a 4.5" square in between as well and double your mileage!

My 12 are winging their way across the Atlantic.  If you want to try them Amanda has the paper piecing pattern on her blog here.  It's really not hard to do and they are quite addictive!

Monday 25 November 2013

Partial seams


Well it turns out that partial seams are not that hard (Anne you were right!)  I was quite surprised that once I got the order worked out my table runner went together quite quickly!

I ended up with partial seams in an effort to simplify my design and make cutting and piecing more efficient.   I combined where possible squares into rectangles. This left me with a bit of a puzzle in terms of assembly. The centre section of my table runner would have 5 pieces to sew together with some meeting only partially and not a straight line across. After staring at it for a while (about the time it takes to drink 1 1/2 cups of tea and dunk 2 rich tea biscuits) I figured just plunge in and start with the lone rectangle.
 

 I sewed it on 2/3rds of the way and this gave me a nice straight edge to add the left piece.

Then I could sew the long piece# 3 to the bottom edge of these two.
And then add on piece number 4 on the right to the resulting straight edge of (1+2)+3.
 Finally then I was able to close the first seam left partially sewn right across the added pieces to finish it off.

It's a little on the small size now it's all pieced (about the size of the ironing board or coffee table sized). I hope my swap partner will be happy with it when it's done. I'm happy so far and have learned quite a bit doing this both from the design and assembly stages. Now I have to give it a good pressing, go buy backing fabric and figure how to quilt it!


Tuesday 19 November 2013

WIP Wednesday - Table Runner

This week I've been working on my table topper for the Modern Quilt Guild of Ireland Christmas swap and it is starting to come together for me now.  I have learned quite a few things on the way designing this star runner.

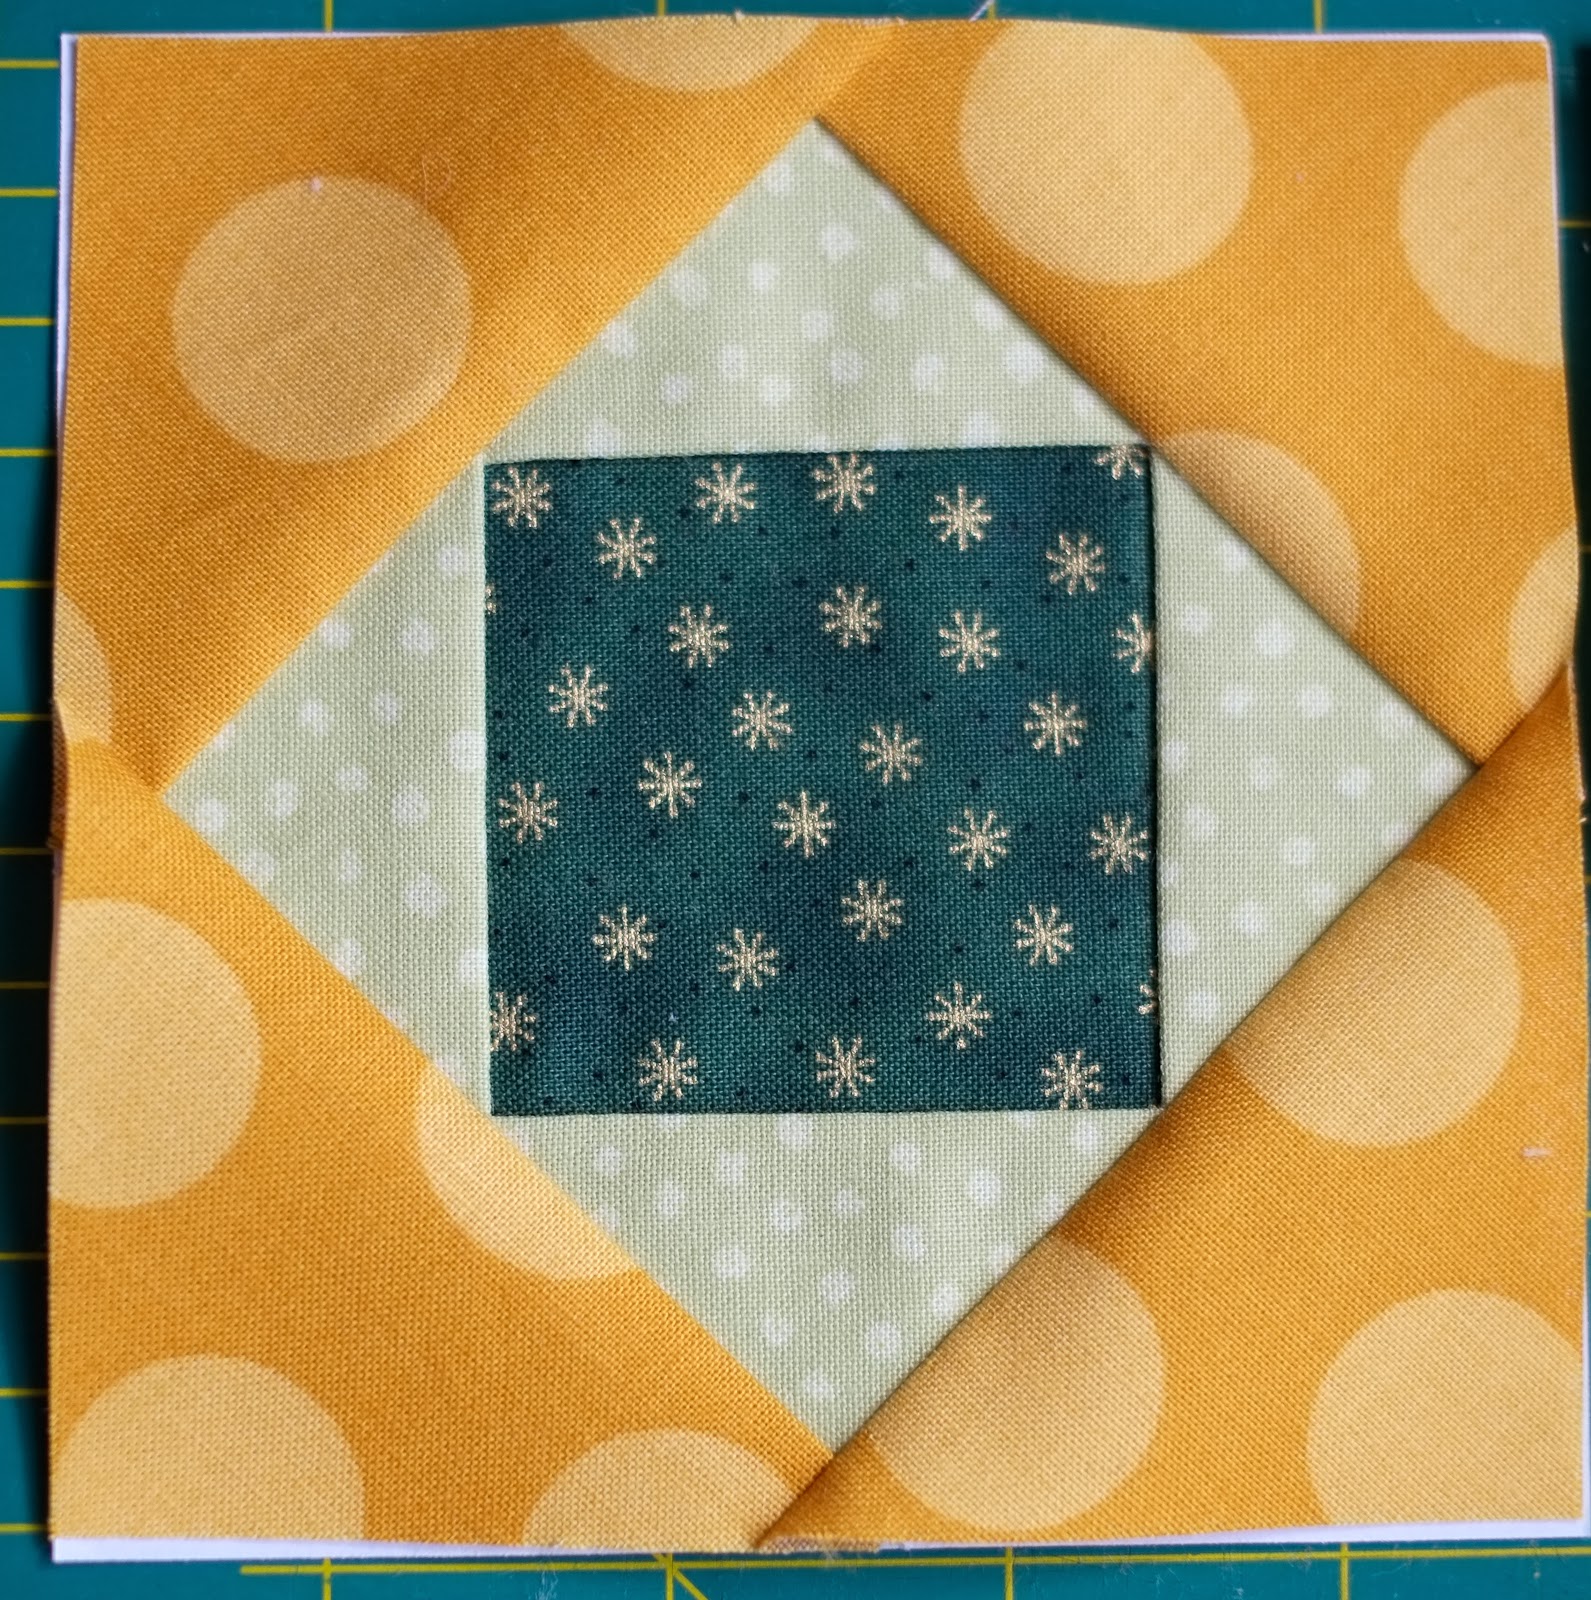
I had this block I made previously as the start of a design idea.  I call it Star Crossing.

I removed the pinwheel and played with the lights and darks on the background and came up with this which I thought would be a really cool Christmas project.
Getting a bit fancy I turned it on point to make the little squares bigger and have less seams to sew.  Then I noticed some of the squares could be rectangles so it became this: 

I realised this was going to be a bit tricky to put together as I was not making clear rows now and I had cut some of rectangles too long.  So I went back to my computer and played with shapes to make mini blocks and came up with this as being all the parts I needed for my project.

 All good so far.  I like symmetry and was quite happy to make these blocks chain piecing as I went along. 
The two floating rectangles in the middle should have given me a hint but it wasn't until I laid the piece parts out to sew in blocks that I saw I'd have 2 areas where I would have to sew partial seams.  I'm ok with it though I haven't done it before but I am happy to try! 


The other thing that struck me when piecing the HST is I could have been a bit smarter if I hadn't been using precuts. Instead of piecing 2.5" squares and 3" HST I should have taken a 10" square and cut along the diagonals twice to make quarter square triangles.  That would have kept my outside edges on the grain and avoided having bias edges all along the runner. 

So I guess I'll be using starch and lots of pins when I'm quilting and binding this one!  Still nothing ventured, nothing gained.  I'm happy with how it looks.  It's pretty close to how I imagined it and I love the colours in this fabric range Joy.


Linking up to WIP Wednesday and I Quilt Thursdays!

Thursday 14 November 2013

Christmas swap!

Even though I may count up the days on the calendar I really dislike it when I'm reminded of how many weeks it is to Christmas or how many shopping days are left.  For some reason the DJ's on Irish radio like to remind us of this every day!

I much prefer the Christmas conversations that revolve around ideas for gifts or decorating the house.  So today's post is about the Modern Quilt Guild of Ireland's Christmas swap.  We are making either a table runner or a table topper.   Something manageable between now and Christmas and something to help make the house look pretty, how could I resist?

This is a secret swap so to help our partner choose material and designs a mosaic was called for.  I really love making these.  Big huge labs makes it very easy to either add in the url of an image or make a mosaic from Flickr favourites. 

1. Winter Baubles, 2. From Belair to Yosemite, 3. Tablerunner Progress, 4. Minimalist trees Modern Christmas Table Runner, 5. brrr christmas table runner, 6. Table Runner for the SHG Table Runner and Wall Hanging Swap, 7. Christmas table runner, 8. Christmas Fabric Bee- Finally!, 9. Holiday Table Runner, 10. Snowman Table Runner, 11. Christmas table runner, 12. Christmas table runner finished!, 13. Christmas Wonky Star Table Runner 1 Detail 2, 14. Nutcracker Sweets Table Runner, 15. Finished Christmas table runner, 16. Funky Christmas Table Runner

I'm liking the first two especially.  Almost everyone had trees in their picks at some point and the colours were mostly red and green, traditional Christmas colours, but used in a modern style.  My swap partner's brief was very open, any size, anything you want really.  So I have decided to take a break from applique and make this design I came up with from my star crossing block earlier this year.


I had intended to make this for Christmas in frosty colours as part of my Finish-A-Long goals so I'm killing two birds with one stone and using the design for this swap.  I did get some guidelines on colour from my partner.  She likes contrast and the colour red so I pulled fabric and tested it on the design and it has been a few days of tormenting G with:  What so you think? Does this go with this?  How about...

Options included:
 
But in the end I decided to go with these from Joy by Kate Spain with a Kona Snow background.

So now I'm drafting the design on point to make it easier to make.  The original design was based on a large block with flying geese, HST and squares.  Turning the design on point and constructing in rows I should be able to get the number of seams down from over 200 tiny pieces to about half that in larger pieces, mostly squares & rectangles.
So that's the plan.  I have to have it in the post by the 9th December.  I hope my partner likes where I'm going with this!

Linking up to Needle & Thread Thursday and

Monday 11 November 2013

The versatile Log Cabin


A few Bee's emerged from Plum & June's Let's Get Acquainted blog hop this summer and the one I'm in is the Global Scrap Bee.  November is Leigh Anne's turn to be Queen and she picked this log cabin tutorial with low volume one side and coloured the other. She wanted coloured centres and I have to say I love her choice of block.  I made green and others are making other rainbow colours.  I think this will be a lovely quilt.  Blocks measure at 8.5" and great fun to make.

I've been told that traditionally the log cabin has red or yellow in the centre to symbolise the light of the fire or heart of the house.  It's a welcoming gesture and the colours surrounding it are light on one side and dark on the other.  This contrast in the block gives so many ways of arranging the blocks they even have their own names like Barn Raising and Fields and Furrows.

I really like these links that show lots of options and variations on this block from Piecemeal quilts and Connecting threads.  Fons & Porter  have a 24 page free booklet just on log cabins here.  It's been a while since I had made a log cabin block and I really enjoyed making these!

Tuesday 5 November 2013

Free Motion Snaffu's

I know Halloween is over but I'm still working on my Boo To You lap quilt I started last year.  It is one of my projects chosen for Finish-A-Long 2013 so I hope to get it done this year and am quite happy to spend time on it this month.  Come December I want to be in Christmas mode with Santa's and snowy things and put ghosts and dancing skeletons away. 

For this 2" border I wanted to try free motion quilting loops & stars all the way around.  I did what everyone says and practiced on a sheet of paper with a marker before going to fabric to get the pattern into my head. 
Then I practiced on a quilt sandwich before going to my quilt and just as well I did, as I got horrible results on the back!

I changed my needle, cleaned out the bobbin, re-threaded the machine, increased the tension and it helped a teeny bit but didn't get rid of it.  So I changed thread.  Things suddenly got a lot better!

So I've quilted the outside border, not in the colour I originally wanted (a beautiful dark purple) and it's not perfect but I'm happy with it how it looks front and back.  Now the plan is to hand quilt the inner corners with Perle cotton! 

And I made a note in my notebook to watch the back when doing loops!  I use this for taking notes from Craftsy and You Tube.  Every now and then I jot down a design idea.  Plus I really enjoy just flipping through it! 


I've relagated my dark thread to straight line stitching only, unless anyone has any other ideas for me to try?  I've been using a Universal 90 needle with the machine at full speed, feed dogs down.

Linking up to WIP Wednesday and I Quilt Thursdays!

Friday 1 November 2013

Cameras!

In addition to patchwork & quilting and I have a great love for photography.  It's great to get nice shots and to take your time setting things up to create the image but I also love everything to do with the camera itself.


When I saw this fabric over at  Amanda's blog What the Bobbin I knew I had to have it.  She used it to great effect to make a gift for a photographer.   Isn't it the perfect camera enthusiast material?

I love reading about new camera  models, tiny improvements and giant leaps.   Sony's new full frame sensor in a small body is really cool to me!  It bores the pants off most everyone else I know though. So when Gordon asked me what I wanted for my birthday I had a very quick answer for him, a new camera!


So last weekend while I was handstitching my mini quilt the dogs settled themselves into a sychronised dozing pattern.  I just had to reach for the camera and catch these. 


Isn't he the picture of doziness?


Except of course when he thinks dinner is coming.  Then he's wide awake and practicing the sad face!


Charly on the other hand wasn't sure what I was at, pointing a metal contraption in her face!


To me B&W photography is more than a photoshop conversion.  There is something beautiful about a B&W image from start to finish.  My new camera allows me to apply traditional film filters and keep a pure B&W workflow. I love it!  Thank you G!  Now I have to figure out what to do with my B&W camera fabric!

Linking up to Sunday Stash at The Floral Suitcase.
Related Posts Plugin for WordPress, Blogger...