Showing posts with label FMQ. Show all posts

Friday, 18 December 2015

Friday finish and free motion bee & flower tutorials!

So my sewing machine has had a hiccup!  The bobbin has jammed up and no sew joy at all.  The shop I bought it from are on holidays until the 4th of January so it looks like it'll be hand stitching for me over the Christmas break.   In the meantime, I thought I would leave you with one last post showing how I free motion quilted some of the motifs in the mug rugs I made for Lara for our recent best swap ever!!!! 

rough hand stitching on the mini - before quilting

In addition to sharing with you guys process steps and inspiration for a project, this blog does me a big turn by being a place to record details that I can go back to, again and again, particulary if I am trying to remember where I found a block or pattern, or if I'm struggling to remember how to use a special technique.  I thought today I'd share some steps on the flower and bee quilting in these two little projects to save them for reference.


I'm a big fan of The Inbox Jaunt and love Lori's approach to doodling and how it can be used to make quilt motifs.  I've been trying to doodle more and had great fun practicing bee shapes before even attempting to take needle and thread to the mug rug.  I even googled how many wings bee's have and tried a technique Heather Ross recommends in her Creativebug class on fabric design.


The idea is to look at images of an object, practice drawing them to get the shape in your head and in your hands and then put those images aside, take a blank piece of paper and draw from memory.  That way you don't copy someone else's drawing and make your own. 

Following that technique this is how I quilted my bee!
The remaining quilting was just loops in a matching background colour and some steam from the tea to fill the cup.

Knowing how amazing Lara is at applique, I thought my rough and ready approach could do with some backup, so I found some pretty co-ordinating scraps and made a more traditional pieced mug rug to go along with the first one.

Fiona @ Betsy Grey Crafts had a de-stash on instagram and I picked this teacup fabric for the backs!

I had fun quilting this one.  A little bit of stitch in the ditch, some wavy lines, orange peel effect and a doodle flower!
To make the flower I kind of made this up as I went along!

I like how it looks and think next time it would be fun to combine both the bee and the flower and make a garden of them!
So that's it from me for a bit!  Thanks for reading and letting me share my quilty adventures.  Hope everyone enjoys the festivities and has a wonderful Christmas and New Year's celebrations!  

Wednesday, 28 January 2015

Free Motion Quilting Tension

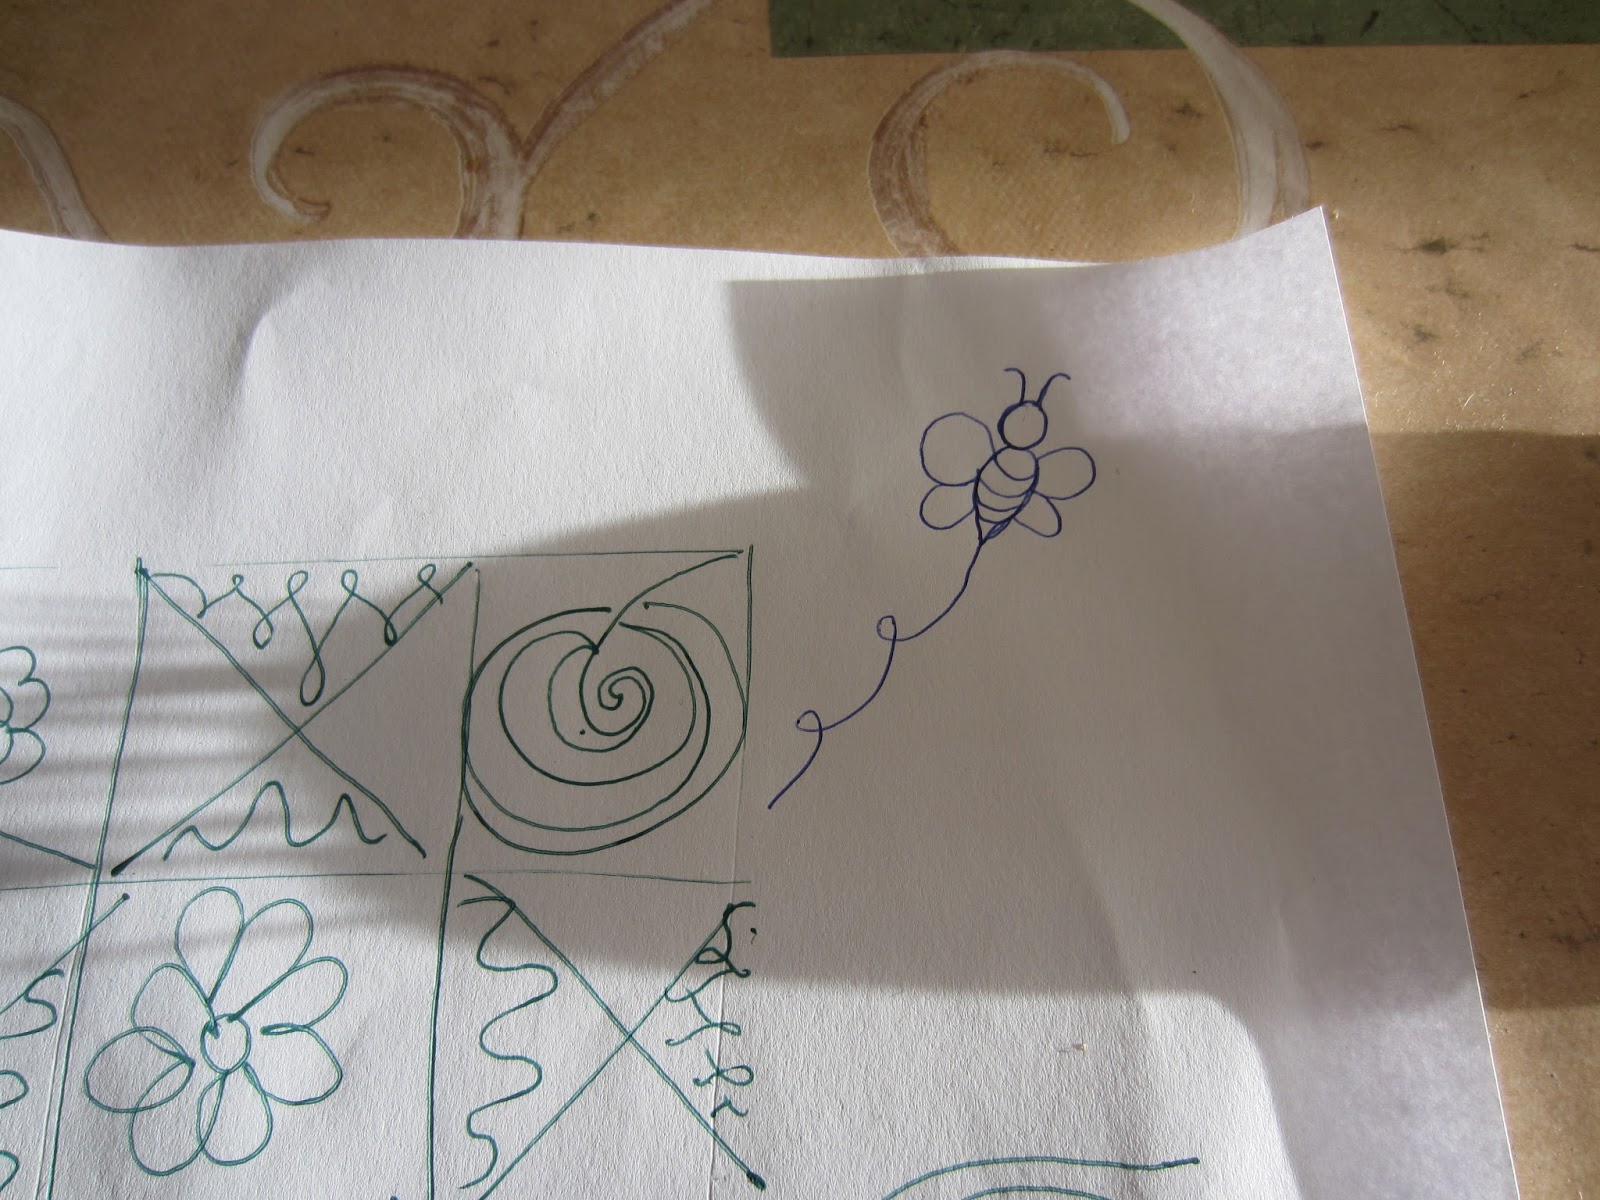
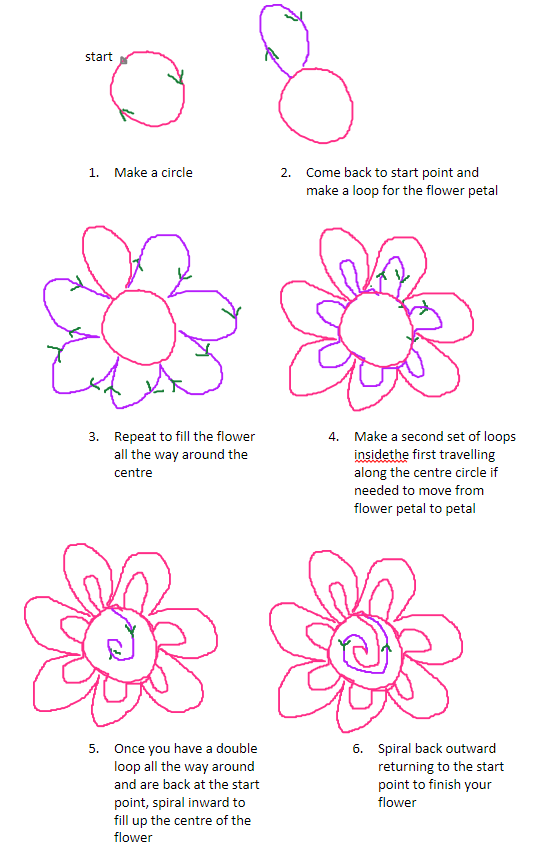
Well my happy clappy, the world is alright with me mood, from my post on Monday, didn't last through the week.  For the last few days I've been battling tension problems!  I'm finishing a quilt for a Fat Quarter shop blog hop next month and decided now would be the perfect time to learn how to do posh swirly flowers (as opposed to the cute loopy ones!)


So I doodled while watching Wolf Hall with G and the dogs all curled up on the sofa and played with scale and added in loops to travel.  I did manage to get stuck a few times with dead space but practicing first on paper helped immensely.  Then I made some practice pieces, to quilt on my big Husqvarna Viking.  All looks lovely on the front but got this on the back:

The usual eyelashes when going around in a circle I expected, (I've been told its hand movement out of synch with foot pedal speed), but not the bobbin thread lying on the back of the quilt in the straighter areas.  All looks like its just resting there to me.  So I did the usual, clean the machine, oil it, re- thread everything, changed needle and no luck.  Increased the top tension - still no luck.

So, then I hit the search engines and read lots of advice, some of which is to try it in straight stitch mode and if that works ok, then its not the tension but the speed of my hands.

Try quilting with the feed dogs up.  My Husqvarna Viking doesn't allow a 0 length so I tried it on 0.5.  A little better but not much.

Change from fixed embroidery foot to hopping foot.  I tried the purple big foot and that was worse!  I went through 4 more practice sandwiches and was still not too happy with it.

A bit perplexed, I decided to try a practice piece on my small Pfaff which I've used to quilt smaller items.  I love this machine.  It's my take everywhere and I use it for almost all my piecing.  (I can get a better scant 1/4" with the HV though for some reason!) 

So off I went to practice sandwich number 6 on the Pfaff.  Much, much better.  Still need to get better control of my hand speed but at least there were proper stitches on the back!


So thinking its not just me, (though I'm not great at going slowly), I contemplated for a bit trying to wrangle a throw or bed sized quilt through the 5 1/2" space on my Pfaff.  Then I came to my senses.  I have an 8 1/2" machine I bought for bigger projects - make it work!

I eventually did what I probably should have done first and read the manual!  Turns out my machine automatically sets tension for the stitch type.  (It has an embroidery function too and the tension is set when you plug the embroidery bed in.)  You can override it with buttons on the front but your presser foot has to be in the down position for this to work.  Thinking I had an aha moment I increased tension with the foot down and then the thread broke!  Twice.  Grrrr.  This machine just does not like to be messed with.


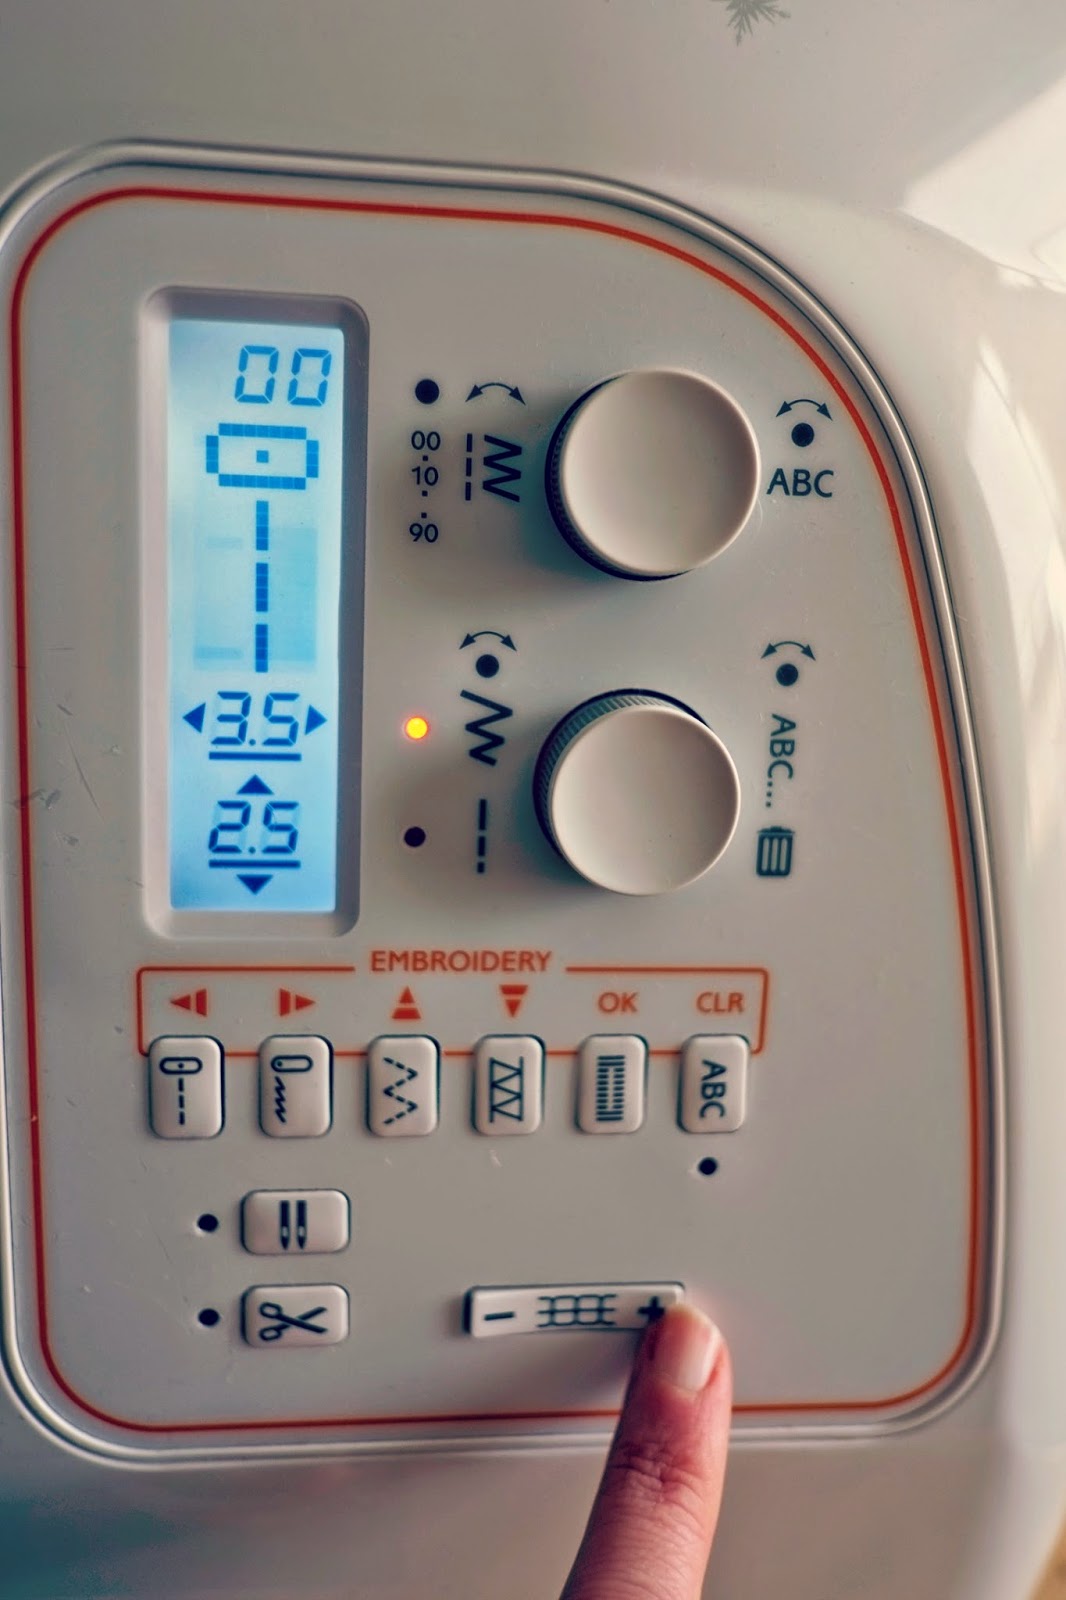
Even though the manual says don't touch the bobbin tension I gave in and borrowed a tiny screwdriver from G.  I've read to turn it a 1/4 at a time and test.  Eventually after 1 complete turn to the left I got better results front and back.  This is what I'm sticking with for now!  Of course when I want to make some labels and use the embroidery function I'll have to change it back.  Wonder how much a bobbin case costs, might need to buy another.  Anyone do that , have a spare on hand? 


So I'm finally motoring along now and have plenty of practice at swirly flowers before even touching the quilt!  I've gotten more confidence and am increasing the scale of the flowers (otherwise I'll be all year quilting it!).  I am loving these titanium needles I got on a massdrop offer and as always using Aurifil 50wt thread (my favourite light pink colour 2410).


The fabrics are Amy Butler which I've not used before.  These pretty fabrics are a bit fussy for my normal taste but I love the oriental feel to them.  This one reminds me of the Temple of Heaven in Beijing.  4 of us went to China on a 22 day holiday a good number of years back and this quilt is destined for one of them - can't say who as they might be reading! 

Gratefully linking up to
Sew Fresh QuiltsWIP Wednesday at Freshly Pieced

Monday, 23 June 2014

Free Motion Quilting with Mary Palmer


This weekend, I attended my first quilting class!  Mary Palmer was giving a class at the Limerick Quilt Centre on Free Motion quilting.  It was great fun!  We saw lots of inspirational work at the beginning of the day.  Mary had brought a huge pile of quilts for Show and Tell and talked us through the design process and quilting choices.  They were all so different and some were quilted on a teeny tiny scale!

 
Mary helped us set up our machines, ensure tension looked good (something I struggle with on my own at home!), gave us lots of tips and introduced us to FMQ designs like loops, hearts and flowers and out of the 12 panels most of us got 7 done.  These are my squares:


We were sent home with the instructions to practice, practice, practice!  From the few quilts I free motion quilted and my previous practice sessions at home I’ve been working on a much larger scale.


Figure of 8 is probably my new favourite design, though I wobble on starts and stops!  I have now added waves to my skill set too.

For our practice panels we were working in a space 8” square.  I found the smaller scale gave me much more confidence with FMQ and  I am determined to practice more and get spirals nailed down next.  After all, I have 5 blank squares left to fill up!

I can highly recommend this Free Motion Quilting Class, Mary was lovely and her quilts were fantastic as learning tools and inspiration.  We all had great fun, chatting the day away while practising what we were taught and the day flew by!

We were advised to use what we learned on a small project like a cushion.  Don't think I'll have a problem with that one! 
Related Posts Plugin for WordPress, Blogger...