Showing posts with label Finish it up Friday. Show all posts

Wednesday, 8 November 2017

WIP Wednesday - Still lots going on!

Keeping up a blog relies as much on habit as it does on making things to show but sometimes, the time it takes to write up a blog post, is lost to fun things like visiting family home for a month, secret sewing projects for new classes & workshops, designs for publication and guild work and the not so fun things like cleaning the house, reactions to the flu jab and ironing the clothes!


Having said all that, I feel the pull to the blog very strongly every now and again as the act of writing about WIP's and design ideas, things I've explored or learned and the desire to express that, gives me a sense of satisfaction and joy in sharing.  And there has been lots going on!


As Chairperson for the Irish Patchwork Society (IPS), there was the AGM where afterwards the guest speaker was Janice Gunner from the British Guild of Quilters.   We learned all about the different Japanese textiles made from Shibori techniques and got to see samples Janice had created (images above).  If anyone has or knows of some good books on Quilt History and Textiles I would be really interested in learning more - so far I have found very little in depth books that you could settle in by the fire and a strong cuppa tea and spend an hour or two devouring so suggestions would be greatly appreciated!


There are a pile of quilt tops and WIP's ready to be worked on, a new website for the IPS with lots of members only content planned and in progress, 4 new designs in various stages which will need pattern testing at some point and a pile of fabric waiting for cutting!


In the midst of writing about log cabins for the new IPS website I created these illustrations to show improv log cabins and now want to drop everything and make them so last weekend I uploaded the images to Playcrafts palette builder and bought a bucket load of solids from the Limerick Quilt Centre.  Thinking of a one block quilt in green for our brown leather sofa!  Nice and bright for the winter - should be cheery!


Another idea that came from the Elements of a Modern Quilt Class I am preparing for the IPS next March is this Triangle play quilt.  Really like the orange and blue with Kona Coal on this one so bought the fabric for that too, this time from Plush addict!


I had been without my large sewing machine for 3 months too as it was getting repaired - remember the bother I had with it for North South East & West?  Well turns out there was a teeny tiny spring gone in the bottom and we think that may have been catching the thread as I moved my hands in the 10 O'Clock position!


Lastly I have had this quilt on the design wall since August when we had to say goodbye to Wilbur and I just didn't feel like getting on with it.  Time is right now so I have two versions of Home is Where the Dog Is on the go.  I pieced in a day this minimalist one inspired by Wilbur's Kennel!  A finished Quilt top feels like progress.  Now to get on with the quilting!  I'm hoping to quilt the text in relief with straight line quilting around the shapes!

So much more to do....stay tuned...giveaway coming up this month too!


Linking up to Let's Bee Social, Needle and Thread Thursday and the Friday Finishes!

Friday, 28 October 2016

Finish it Friday - some quilt flimsies using up bee blocks!

In the middle of our holiday we had a few days at home while Maggie, our puppy, was having her neutering operation.  It was a good time to do it, as we had to keep the other two away from her for a few days, in case they would go at her stitches and she was able to keep me company, while I caught up on a few things and not get too bored all on her ownio!

While sorting my stuff to tidy up before my cousin came to visit, I found some stash bee blocks made for me, from stash bee 2014!  I had picked the Spring Blossom quilt block by Charise Creates and didn't really have a plan in mind for them.  As always with Bee's you get unexpected things, sometimes blocks are a little too big or a little too small, or an odd colouring to the other blocks like the navy centre one above.


I had recently bought Amy Gibsons Quilt Block Cookbook with 50 block patterns in it.  Having been a big fan of hers since I learned how to piece blocks on her free Craftsy Class Block of the Month 2012, I knew I was going to really enjoy her book.  The blocks are fun but even better are the 7 layouts she gives for using some of the 50 blocks, to make a not so traditional sampler quilt.  The few pages at the end of the book got me thinking and made buying the whole book so worthwhile.  So I took apart a version of my star crossing block above, in navy and lemon, and used the pieces to frame the flowers.


I managed to get a small cot quilt out of both and really like that the navy in the squares now makes the dark flower centre work!  There are 5 blocks left still, so I had a go at putting them into a flower garden of my own and another of Amy's layouts from the books using columns of colour.


I think I am going to go with the layout from the book below but would like to come back to the garden for another go at it as I think there is something there.  I can complicate designs and sometimes I think simple is best!

Not having gotten around to that one yet, I did revisit the blocks I made in 2012, that were still sitting in a box!  I made the mistake of buying the cheapest fabric I could for my first quilt and not really liking it much, I still liked the blocks but didn't overly love it enough to finish the quilt.  I now only buy fabric I love and try not to think too much on the price (unless its Liberty at 24 a metre!)


Using Amy's celestial layout, I picked the blocks that I thought would work well together and added in a lot of Kona Snow, that I had on hand on a bolt. (I bought a whole bolt of Snow and White and it was the best decision ever as you can get right to making when inspiration strikes!)


At our last branch meeting, I showed my two new finished quilt tops - all from my WIP box and no new blocks needed!


And for the stuff I should have been making?  Finished my Snowflake Shimmer quilt (QAL with Quilting Jet Girl) and there is good chance I will have this finished for Christmas!  Made lots of progress on my round on Erin's Round Robin quilt!  200+ paper pieced sub-units later...


This seemed like a great idea when I first started it.  When I realised how long it would take me, I did think twice but it felt like the right thing for the quilt and I didn't want to let Erin down by doing something not as good so I just had to get on with it!


Nearly there now!


So a bunch of finishes and a lot of work in progress!  Happy Friday everybody!

Monday, 14 September 2015

When you are on a roll… Finished Sewing Machine Cover

Having had so much fun quilting paw prints this past week, I decided to take a leaf out of Jasmine’s book and  keep going to finish up a project or two. Dog Gone Cute is done but I'm saving the finished item for my turn on the blog hop next month.

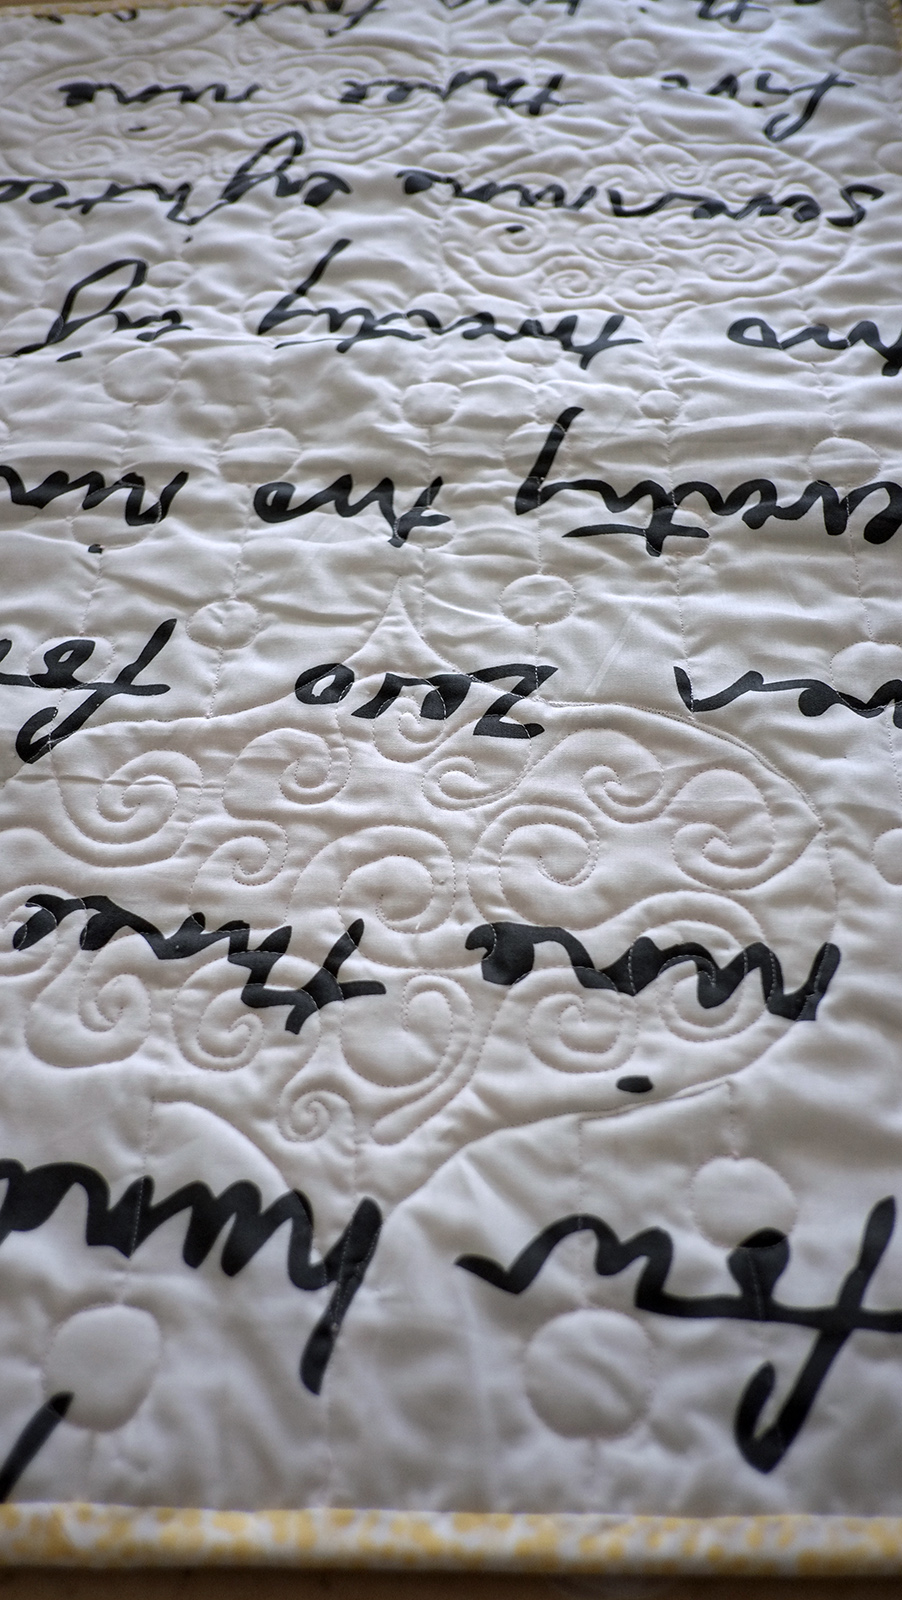
Remember this sewing machine cover that I made way back in March? It’s based on the Ornaments quilt from Angela Pingel’s book called A Quilters Mixology: Shaking up curved piecing. I can’t believe its been sitting covering my machine, pin basted and unfinished all this time!

So feeling the quilting groove this week, I decided to have a good look at it and come up with something not a stipple or a wiggle.

When I first saw this pattern using the Drunkards path block, it reminded be of Tales from the Arabian nights and Aladdin’s lamp. So I wanted something swirly in the lanterns a bit like smoke.

For the background I had no idea and I guess the pattern being called ornaments made me thing of strings of pearls so I went with straight lines and circles.


My favourite thread is Aurifil 2410, a very light pink – it just seems to go with everything from piecing to quilting so I used that on top and tried hard to stitch in the ditch – disaster – but everything else went ok!

I marked the straight lines with some chalk and free motioned them adding in some circles every now and again trying to stagger them a little. 


I thought about adding ties to the sides but in the ended didn't bother as my machine stays put here most of the time and I'd only be tying and untying for no reason.  For the past months I've just been laying the cover over the machine when not in use and that's worked grand to keep the dust off as is.


I decided to bind it in the lemony yellow I used for the smallest lantern as its a happy colour compared to the purple.


And here's the finished cover, done & dusted.  I could get used to finishing projects one after the other.  Linking up to the Friday finishes!

Thursday, 3 September 2015

Summer Swap Tote Bag - A Finish

This year the Modern Quilters Ireland group had a summer swap. We've been making tote bags for each other, big enough to hold a magazine and room for a crafty project or two!  This is due to be delivered to my swap partner today so I thought I'd share some photos!


My swap partner loves bright happy fabrics and didn't have too many dislikes so I had a lot of free reign in coming up with something that she would like and would be in the spirit of modern quilting.  I knew I wanted to have a nice front to the bag and thought about paper pieced stars.  My original idea was to have 4 snall stars on one side and 1 big one on the back and then I had a rethink.  I thought I might be over complicating things.


Thumbing through some old editions of Quilt Now I spotted Laura Hartrich's Goodnight, Love you bed quilt. I love this quilt and think the clever way of using drunkards path for the heart and letters is really visually interesting.  I chose Noodlehead's Super tote as the basis for the bag as it offered a really lovley big pocket on the front of the bag.  Looking at the maths to make this fit would mean really small drunkards path blocks so I made them all triangles instead!


I pulled from scraps and have fabrics in here from my Lost in London and most recent swoon quilt.  this was so much fun I decided to make a second pocket for the back and appliqued the O and E to make this a bit easier and faster to make.


The super tote pattern has a pocket on one side only but it was really easy to just make 2!  I loved this pattern - it is really well written and once all the interfacing is ironed on it sews together quickly.


I had the idea of quilting in some text to have this say Love...summer holidays, friendship, family, sunshine...  I think I may need to practice quilt writing a little bit more as it was not quite as smooth as I had envisioned!


I wanted the bag to be slouchy and not too stiff so the heart got some gentle wiggling , enough to keep the layers in place!


So here you have it!  My take on a summer tote bag!  There are rumours of an Indian summer so my swap partner may get to use it yet!


Linking up to the Friday Finishes!

Friday, 10 July 2015

Fairy Tale Swap–a finish!

Last week I showed you the extra handmade item for this swap, a project book from Aneela Hooey’s pattern.  Today I have the main swap item to share.  This is my Princess and the Pea mini-quilt called Wide Awake!
I signed up for the #SPDFairytaleswap on Instagram and the shipping date was last week so I’ve been paper piecing, making templates, trying out some fancy stitches on my new machine trying to make a Princess and the Pea mini in perspective!
My partner  loves bright, happy fabrics, no browns or muted colours so I chose some layer cake squares from Me and My Sister’s Hubba Hubba collection.  I designed the bed in EQ7 and foundation paper pieced the mattresses.
For the canopy, I drew it on blank paper following the lines of the mattresses and used the sides as templates to cut pieces.  I  backed the pieces with fusible web to iron in place and used fusible for the bed posts too.
I had the idea that while the Princess was trying to sleep on her collection of mattresses, a little dog would be curled up in his tiny bed snoring his head off!
I sketched out a dog based very much on Charly when she is all curled up and then used fabric backed with more fusible paper to put him and his bed together.  His name is Toby (Toby was our very first dog.  He was very snuggly and loved to curl up!)
To give the impression of the Princess being wide awake I had the idea of her counting sheep.  Funnily enough this month’s Love Patchwork & Quilting Magazine has a jumping sheep mini-quilt with templates so it was really easy to make the sheep!  When the universe gives you exactly what you are thinking of I think its called synchonicity!
I had intended to put in a dressing table and crown and a window with the night sky but it was getting a bit big and a bit fussy so I stopped at that and embellished the bed, to make it fit for Royalty instead!
I had fun using some of the speciality stitches to add hearts, stars and fancy scrolling to the bed to make it more like something you would find in a castle!
Finally a bit of quilting in the background.  I’m sorry now I didn’t quilt in some bricks or some straight lines.  I thought a large wiggle would melt into the background and not compete with the bed but I don’t really like the look of it, maybe the scale is too big?  Other than that I’m happy with how it came out and hope my swap partner likes it and the rest of the swap package!
I found this Little Red riding hood fabric on LoveFabric.ie and just had to buy him.  Claire thought he was cool but a little creepy!  I agree and I really like the way he is licking his lips! 
So this lot is winging its way across the Atlantic at the moment.   It was a great idea for a swap and I had great fun making for it.  Linking up to the Friday Finishes!
Related Posts Plugin for WordPress, Blogger...