Wednesday, 19 March 2014

Testing a 1/4 inch foot & March Global Scrap Bee update

So, I got a new machine for Christmas.  It's a Pfaff Passport 2.0 lightweight and perfect for taking to sewing nights and classes.  Tell you the truth, with the hard plastic Pfaff cover on it and the extension table attached it's not that light, but it does have a handy spot for the pedal and attachment for an accessory bag!  And it is far lighter than my Husqvarna Viking, which has taken up a permanent residence on one end of the kitchen table (that is at least until visitors come to dinner!). 

It came with a free quilting kit which included a 1/4" foot.  I have a 1/4" foot on my Husqvarna and it is pretty accurate.  The foot on the Pfaff looked like it aligned with the 1/4" marking on the machine plate so I paid it no heed and started sewing on my charm pack cherry quilt.  I noticed then that the seams looked a little big and when I measured my block it was short by 1/8" inch, quite a bit off especially when multiplied over the whole quilt.

So I took out the manual, and discovered the default setting for the needle position is 3.5.  To get a smaller seam I moved the needle to the right and tested 4.0 and 4.3 and 4.5.

I took some scraps and trimmed them to 2" wide.  Using the default, and then the other settings I sewed 2 pieces together and measured the results. 


From the top you can see the shortfall on the default.  The middle 4.0 looks good and the bottom 4.3 is almost identical.  The proof is in the pudding so I decided to try to make a block and see what happened.  Jan at Sew and Sow Farm picked a really nice block for March Global Scrap Bee.  The block is called Scrap Jar Stars from A Little Bit Biased.  It involves a centre section of 16 squares perfect for testing seams.  And all from scraps! 


So off I went piecing away, I even trimmed the centre square noticing it was a bit big, not small (this really should have given me a hint!).  I added in the scrappy HST and corners and thought to myself this is a really fun pretty block. 

That is until it came time to trim it.  I had an oversized block.

Which when trimmed meant I was too close to the points in the triangles.  When joined to the next block these points would we eaten up!  Scratching my head trying to figure out what I had done in all my cleverness testing my seams I had a lightbulb moment. 


I checked my machine setting and in all my playing with the needle position I had forgotten to move it back.  I had made the whole block on 4.5.  Doh!


So for the second time this week, I made a second block, this time with 4.0 as the magic number.  


And like magic, ta dah!  Perfect size, very little to trim to make it square.


And points with seam allowance!


So now, I've cracked it I just have to remember to change it from the default every time I turn the machine on!  There is a handy pull out panel and I'm writing a note 4.0 for 1/4" foot and 4.3 for scant - don't use 3.5 or 4.5!


The second good block will be on the way to Jan for her quilt.  Looking at them together on the wall shows how this quilt is going to look - I love it.  This is a great block choice for a scrappy Bee and a brilliant way to use up scraps.

So I hope my everything going wrong on the first block run is over! I've got borders to put together for my medallion quilt and they need to be right to fit my centre panel.  Wish me luck!

Linking up to
WIP Wednesday at Freshly Pieced
Sew Fresh Quilts

Tuesday, 18 March 2014

March Stash Bee Hive 10 Slashed Blocks


Ever have one of those days where your first attempt at a block goes really wrong but the second attempt goes together effortlessly?  Well I'm having one of those days!  This slashed block for Stash Bee hive 10 for March is actually a really fun block to make (on the second attempt!)


My first attempt resulted in a really wonky block, far from square!  Cyndi did ask that we not trim and send untrimmed for her to do the honours.  I can see why!  Still there was no way to get an 8" out of this after all the wonky inserts so I made a second one.


It starts with an 8" square of background fabric and take a slice through it in a gentle curve with the rotary cutter.  Sew in a 1" strip, rotate the block and take another slice.   Straight lines and gentle curves seem to work best.


I made a not so gentle curve, this on my second attempt!  I really didn't want to have to make a third so inserting this strip required lots of pins!


After the curves I stuck to straight lines to finish it off!  And the wonky one?  I've trimmed it to 6.5" and thinking it might make a cute notebook cover a la Fairy Face Designs Put your scraps to Work!  

If you want to try slashed blocks the tutorial for this one is on Stash Bee here and the free Craftsy Block of the Month 2012 with Amy Gibson has a brilliant video showing how to make two versions.  These are the ones I made 2 years ago.


Yes it's been 2 years since I made a slashed block - no wonder I needed the first one to practice!

Monday, 17 March 2014

Happy St.Patrick's Day!

Happy St Patrick's day.  It's been a busy weekend and I'll have quilt tops to show you tomorrow but for the day that's in it I couldn't resist this photo from Wikipedia of astronaut Chris Hadfield.  He donned the green for St. Patrick's in the International Space Station during his time orbiting the Earth!  And yes bowties are cool (even green ones!)

And these dancing bears from Facebook:


Hope all enjoy the celebrations happening where you are!  I'm off to watch scores of scouts and guides wander down O'Connell Street, wish my mum a Happy Anniversary (parents got married on St. Patrick's day!) and have some green ice-cream!

Happy St. Patrick's day!

Wednesday, 12 March 2014

WIP - Fabric Dyes!

Last September, when I joined the Irish Patchwork Society, the Mid-Western branch announced they would be running a fabric dyeing workshop in the Spring. There were limited places and it filled up really quickly (sob!). Then 2 weeks ago a place opened up and I sent my text super fast when I saw the message offering a place. I was lucky and got to be a part of the workshop given by Paula Rafferty last Saturday. It was tons of fun!


We used Procion dyes and fabric presoaked in a Soda Ash fixative. They dyes work with plant based fabrics like cotton really well and react with the fibres in the material to develop colour inside the fibres rather than just on the surface. This is supposed to give the best light fastness and wash fastness.

The powdered dyes were mixed up for us in 3 colours. We had a yellow, red and blue base of primary colours from which to mix other colours. We had a warm and cool yellow (golden & lemon), blue (ultramarine & turquoise) and a magenta colour to work with. I worked with the cool colours and got beautiful jewel toned colours.


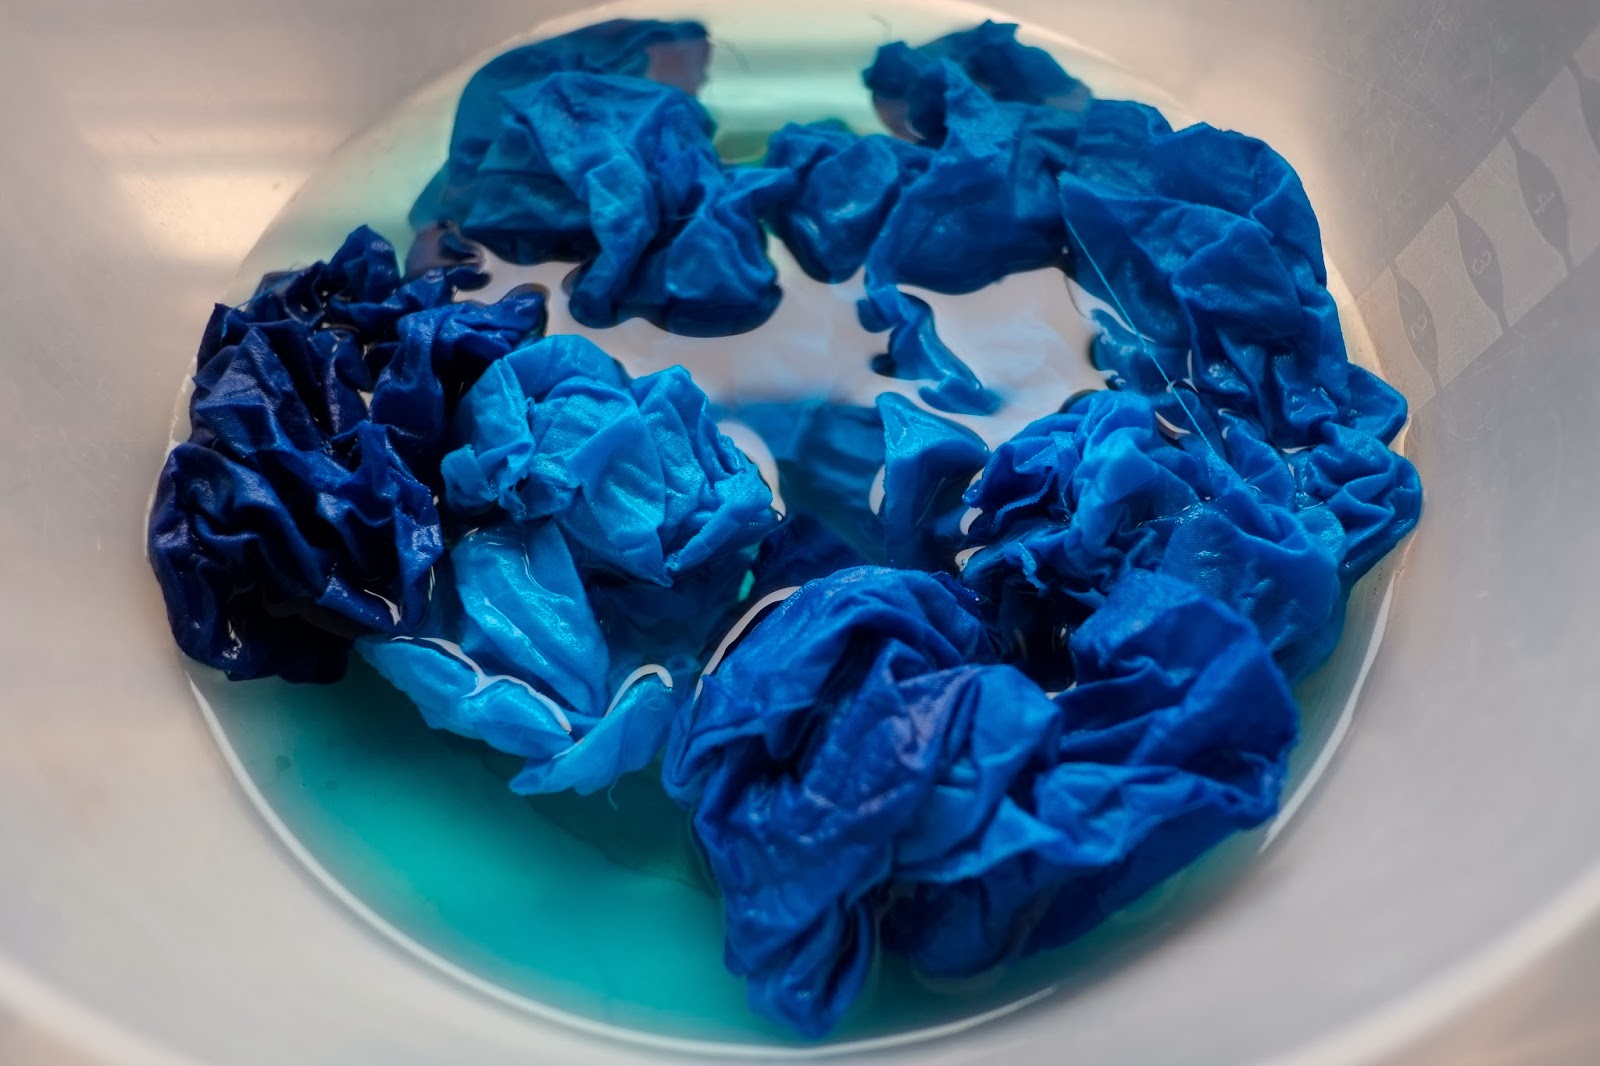
The dye mix was measured and poured into plastic bags (we had variations of yellow/red, blue/red etc. to make all the rainbow colours.).  The pre-soaked fabric was put in the bag and squished and squeezed in the bag to absorb the dye.  This part was great fun!  We had 2 pieces of fabric for every colour and we got a recipe booklet and how to instructions for mixing the colours to take away for later.


We experimented with the leftover dye on some of the scraps we brought with us and some milk cartons, pouring the dye in at stages and layering up the fabric.

Paula's new rescue cat kept us company for most of the day. It was a beautiful day for a change in Limerick and she enjoyed the warmth as much as we did. Jessie the dog popped in and out but didn't stay for long. We had more practical help from Paula's daughter, who helped with separating the fabric for us to keep us from contaminating things with the dyes!  It does help to work in twos to keep one pair of hands dye free!


The hard work was the day after with the rinsing.  It takes a bit of time!


 But don't the colours look gorgeous?


There are 36 squares in total measuring just over 10" in all colours of the rainbow!


 Amazing what you can get from just 3 small scoops of dye!


Even the experimental scraps from the milk carton turned out really well.  I keep singing Bob Marley "We're Jammin'" for some reason washing these guys out!


But I'm still rinsing - yes 4 days later, on the final batch!


So what am I going to do with all of this wonderful colour?  I think I'm going to make a colour wheel.  We've just finished Stitched in Color's  class, Color Intensive, and I learned a lot from her Colour wheel quilt, so I'm going to try and use what I learned and make my own.  I'm interested in what these colours would look like against a black background as well as a white and a grey.


If you want to try for yourself the dyes are available online in Ireland at Cork Art Supplies and in the US at Dharma Trading. I found this nice blog post explaining the process with the milk cartons using red plastic cups. It was a really fun day and Paula looked after us so well. Thank you Paula and thank you ladies for a great workshop!  I can't wait to finish drying these off and getting them ready for the rotary cutter!

Linking up to
WIP Wednesday at Freshly Pieced
Sew Fresh Quilts

Monday, 10 March 2014

Charm Pack Cherry - a fun & quick quilt top!

You know when you see a new fabric range and you just have to have it.  You try and ignore it, given the fact that you already have 2 unopened FQ bundles sitting on the shelf, but eventually you can't help it, you visit every online shop you know of, wander around etsy for a bit and even check out ebay to see if the shipping charges are any better! 

Well that was me with Noteworthy by Sweetwater for Moda.  The moment I saw it I knew I was going to end up buying it.  Feeling totally guilty, I did avoid the FQB (see 2 on hand above!) but I did buy 2 charm packs, a layer cake and a jelly roll!

So they have been sitting in my stash for a while now.  I do have plans for the layer cake and the jelly roll (another Strip & Flip quilt and Anita Grossman Soloman's Arrowhead Block quilt) but I had nothing in mind for the charm packs until I saw the free pattern from Fat Quartershop Charm Pack Cherry.  There is even a you tube video that walks you through the process.  It's made up of 9 patches which when chain pieced go together very quickly.


You make 8 of them starting with solid, print, solid and the other 8 print, solid, print.  I had a charm pack of Moda Bella Solids in neutral shades.  The colours varied from cream to beige and I thought it would mix in well with Noteworthy and instead of using all the one solid colour it could be interesting variation.  The pattern called for 2 charm packs of prints and 2 of solids so only having 1 solid on hand I cut up some yardage of Essex linen in natural and a cream tone on tone in 5" squares to get enough for the 16 blocks. 


The free instructions are really easy to follow and even give recommendations for pressing to make matching seams really easy.  The only difficulty I had in the piecing was down to me and my seam allowance.  I got a new machine for Christmas, a Pfaff Passport which is much smaller and lighter than my Husqvarna Viking.  I intend to bring it to sewing nights and classes that I hope to take this year.  I did get a 1/4" foot with it and decided to try the new machine with this project to get a bit more used to it.  I snapped on the 1/4" foot without testing it and it is not 1/4"!

It's leaving me the teeniest bit short so I need to play with it and probably move the needle to find the sweet spot.  Of course I should have done this before launching into a project but at least with this pattern consistency is more important that exact measurements.  I'm not making blocks for Bees or swaps, so I can live with a smaller dimension.  Once I noticed I was coming up short I kept on going without changing anything to ensure the blocks were consistent and would nest together ok.


The pattern calls for the blocks to be cut in half and gives dimensions.  As mine were slightly off I folded the blocks in half to find the centre line and cut along that.  Re-arranging the cut pieces as below gives the 2 blocks that make up the rest of the pattern.
 

So here they are up on the design wall ready to be sewn together.  I really like the scattered nature of this quilt and am delighted with the colour mix between pattern and print.  If you have 2 charm packs, forgotten about in your stash or just waiting for the right project, check out the free pattern.  It's a quick, fun pattern to make.  I've really enjoyed it and am thinking of stippling it all over in the quilting stage to make it nice and wrinkly!
 
(Oh and in case you are wondering my makeshift design wall is propped up at the moment on the dogs travel crate!)


Linking up to Linking up to Design wall Monday and
stitch by stitch

Wednesday, 5 March 2014

WIP - Another border on the Medallion Baby quilt


The insatiable fabric monster, aka Hexie Baby Medallion Quilt, is chugging along.  I've been working on this and only this and am still behind for today's status update with the MQG of Ireland Quilt-A-Long!  Oh well, I  am making progress - did I mention handstitching hexagons is a slow, easy going kind of a thing?  I still need to stitch in the balloon/basket lines and add the clouds in the centre panel. I have watched 17 episodes of Persons of Interest while making this so far, plus the odd episode of Midsomer Murders!


The chequerboard border took 2 fat quarters and is not as square as I would have liked (lots of seams!)  I'm  hoping it will straighten out as I add more to it.  The next border is made up of a frame to grow the quilt top, to make the Maths easier, to add the outside row of 3" diamonds.


I had hoped to make the diamonds all from scraps but did in the end have to cut into a charm pack from Me & my Sister.  The centre panel hexagons are entirely from scraps.  Last year, the MQG of Ireland had a pin cushion swap and I got this beauty from Rosie, along with some fabric and I've used the fabric for the centre panel and managed to make it stretch for some diamonds too.

I like the idea of the fabric linking the MQGI projects to each other!

I used a low volume polkadot for the frame to keep everything soft and I'm thinking it might be a little too soft.  One of the things we've been learning in Stitched in Color's class, Colour Intensive, is fabrics with a lot of white in them can tone down the saturation of neighbouring colours.  I can see this with my border choices above and though it was a deliberate decision I'm thinking of adding in a skinny border to frame the centre panel and help draw focus inwards. 


What do you think?  Pink to the rescue or not?

 
So this lot needs to be sewn up and then its onto flying geese for the next round.  So glad we have 3 weeks until the next check in because I have 86 of them to make!  Did I mention yet that Medallions use a savage amount of fabric? 

Linking up to Modern Quilt Guild of Ireland and
WIP Wednesday at Freshly Pieced
Sew Fresh Quilts
Related Posts Plugin for WordPress, Blogger...